Topic: Screen recording guides
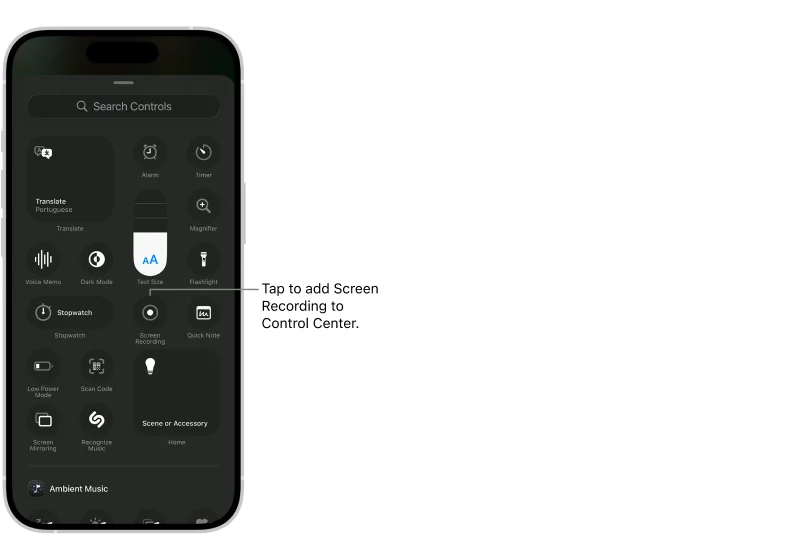
If you searched for how to screen record on iPhone, use the built-in Screen Recording control. Open Control Center, add the control if it is missing, tap it, wait for the three-second countdown, and perform the action you want to capture. To include your voice, press and hold the Screen Recording control first and turn on Microphone.
Your recording is saved to Photos. The important limitation is audio: microphone narration is optional, but an app can still block its own audio or video from being captured. Apple also says screen recording and Screen Mirroring cannot run at the same time.
Quick Steps to Screen Record on iPhone
The current path depends on your iOS version and iPhone model.
| Your setup | Open Control Center | Add Screen Recording |
|---|---|---|
| iPhone with Face ID | Swipe down from the top-right corner | On iOS 18 and later, press and hold the Control Center background, tap Add a Control, then choose Screen Recording |
| iPhone with a Home button | Swipe up from the bottom edge | On iOS 18 and later, add the control from the Control Center controls gallery |
| iOS 17 or earlier | Use the gesture for your iPhone model | Open Settings, choose Control Center, then add Screen Recording |
Once the control is available:
- Open Control Center.
- Tap the Screen Recording button.
- Wait for the three-second countdown.
- Close Control Center and complete the task you want to show.
- Tap the red recording indicator at the top of the screen and confirm Stop. You can also return to Control Center and tap the red Screen Recording button.
- Open Photos to review the video.
Apple documents the current flow in its iPhone screen recording guide. Apple separately explains the Face ID and Home button gestures in its Control Center support page.
How to Screen Record on iPhone with Your Voice
Turning on Microphone adds your narration and nearby sound to the screen recording.
- Open Control Center.
- Press and hold the Screen Recording control.
- Tap Microphone so it is on.
- Tap Start Recording.
- Wait for the countdown, close Control Center, and begin speaking.
Use this mode for an app walkthrough, family tech support, a bug explanation, or a short tutorial. Keep the microphone close enough for a clear voice, and use headphones when app sound could feed back into the mic.
Microphone audio and app audio are different sources. Turning on Microphone does not guarantee that an app will allow its internal sound to be recorded. Apple notes that some apps may block audio or video capture. Treat a ten-second playback test as the source of truth for the app you plan to show.
Why an iPhone Screen Recording Has No Sound
Start by identifying which sound is missing.
| What is missing | Most likely explanation | What to try |
|---|---|---|
| Your voice | Microphone was off or unavailable | Press and hold Screen Recording, turn on Microphone, and make a new test clip |
| App sound | The app does not expose that audio to screen recording | Test another app; do not promise protected or restricted audio can be captured |
| Both voice and app sound | The wrong recording was reviewed, the recording did not finish, or the app restricted capture | Stop cleanly, find the newest clip in Photos, and test a simple home-screen recording |
| Audio is distorted or echoes | Speaker output is feeding into the microphone | Lower speaker volume or use headphones |
| Recording will not start while mirroring | Screen Mirroring is active | Stop Screen Mirroring, then start the screen recording again |
Do not install an unknown recorder just to bypass an app restriction. A blank or silent result can be intentional content protection, not a broken iPhone setting.
How to Find and Trim the Recording
On the current Photos layout, open Photos, choose Collections, scroll to Media Types, and open Screen Recordings. On older iOS layouts, you may find Screen Recordings under Albums or Media Types.
To remove the countdown, a pause, or the moment you stopped recording:
- Open the recording in Photos.
- Tap Edit.
- Drag the handles at both ends of the timeline.
- Tap Done.
- Choose Save Video to replace the trimmed version, or Save Video as New Clip to keep the original too.
Apple's Photos trimming guide shows the current timeline controls and the difference between saving over the video and creating a new clip.

Saving as a new clip is the safer choice when the recording contains a moment you may need later. Keep the original until you have watched the trimmed version from beginning to end.
Fix a Missing Screen Recording Control
First, account for the version change:
- iOS 18 and later: open Control Center, press and hold the background, tap Add a Control, and select Screen Recording.
- iOS 17 or earlier: open Settings, choose Control Center, and add Screen Recording there. Apple's archived iOS 17 screen recording guide documents this older path.
If the control is still unavailable, check whether the iPhone is managed by a school or employer. Apple's device-management restrictions allow an administrator to disable screenshots and screen recordings on managed devices. In that case, the correct fix is to contact the device administrator, not to search for a bypass.
Screen Recording Privacy Preflight
An iPhone screen recording can reveal more than the task you meant to show. Run this checklist before a tutorial, support clip, or social post:
- Turn on Focus or silence notifications.
- Close messages, email, banking, health, password, and customer-data screens.
- Hide sensitive browser tabs and autofill suggestions.
- Decide whether microphone narration is actually needed.
- Lock the orientation before the final take if the app should stay portrait or landscape.
- Record a ten-second rehearsal and check both picture and sound.
- Trim the opening and ending in Photos before sharing.
- Watch the exported clip at full screen for names, notifications, account details, and location clues.
This privacy pass matters more than the recording length. Cropping later cannot remove information that remains visible inside the final frame.
When You Also Need a Mac Screen Recording
The iPhone's built-in recorder is the right answer for an iPhone-only task. Redol Screen Recorder does not record an iPhone directly; it is currently a macOS screen recorder.
Use Redol Screen Recorder only when your project also needs a separate Mac segment, such as a desktop tutorial, browser walkthrough, product demo, course lesson, or support video. The current Redol product page supports Mac screen capture, system audio, microphone narration, webcam overlay, crop and resize controls, zooms, cursor emphasis, and local MP4 export.
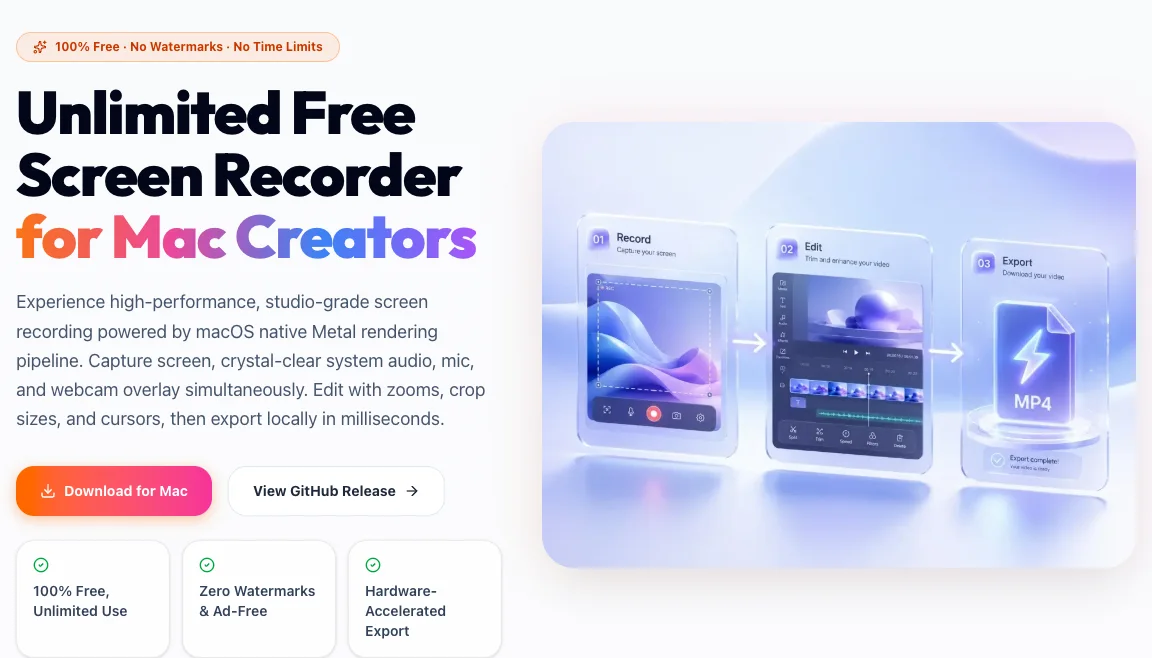
Keep the boundary clear: record the iPhone action with Apple's built-in control, and use Redol for the companion Mac recording when a desktop step is part of the same lesson. For a deeper desktop workflow, see how to screen record on Mac with audio. If privacy depends on showing only one desktop area, use the partial-screen recording guide.
Record the desktop part of your tutorial on Mac
Use Redol Screen Recorder for a separate Mac segment with system audio, microphone narration, webcam overlay, crop controls, and local MP4 export.
Final Checklist
Before sharing the recording, confirm:
- the right Screen Recording control was added for your iOS version
- Microphone was turned on only when narration was needed
- the app actually allowed the sound and picture you expected
- Screen Mirroring was off during recording
- the newest clip was opened in Photos
- the countdown and stop action were trimmed
- notifications and personal data are absent
- the final file was watched once with sound
The fastest reliable workflow is still the simplest one: use the built-in iPhone control, record a short test, verify the audio in Photos, and only then capture the full take.
Related posts
About the Author

Zhang Guo
AI Product Manager · Digital Marketing Consultant
AI product manager and digital marketing consultant with a background in music. I see creativity as the bridge between rhythm and logic, where musical intuition and mathematical precision can coexist in every meaningful product decision.
Follow on X