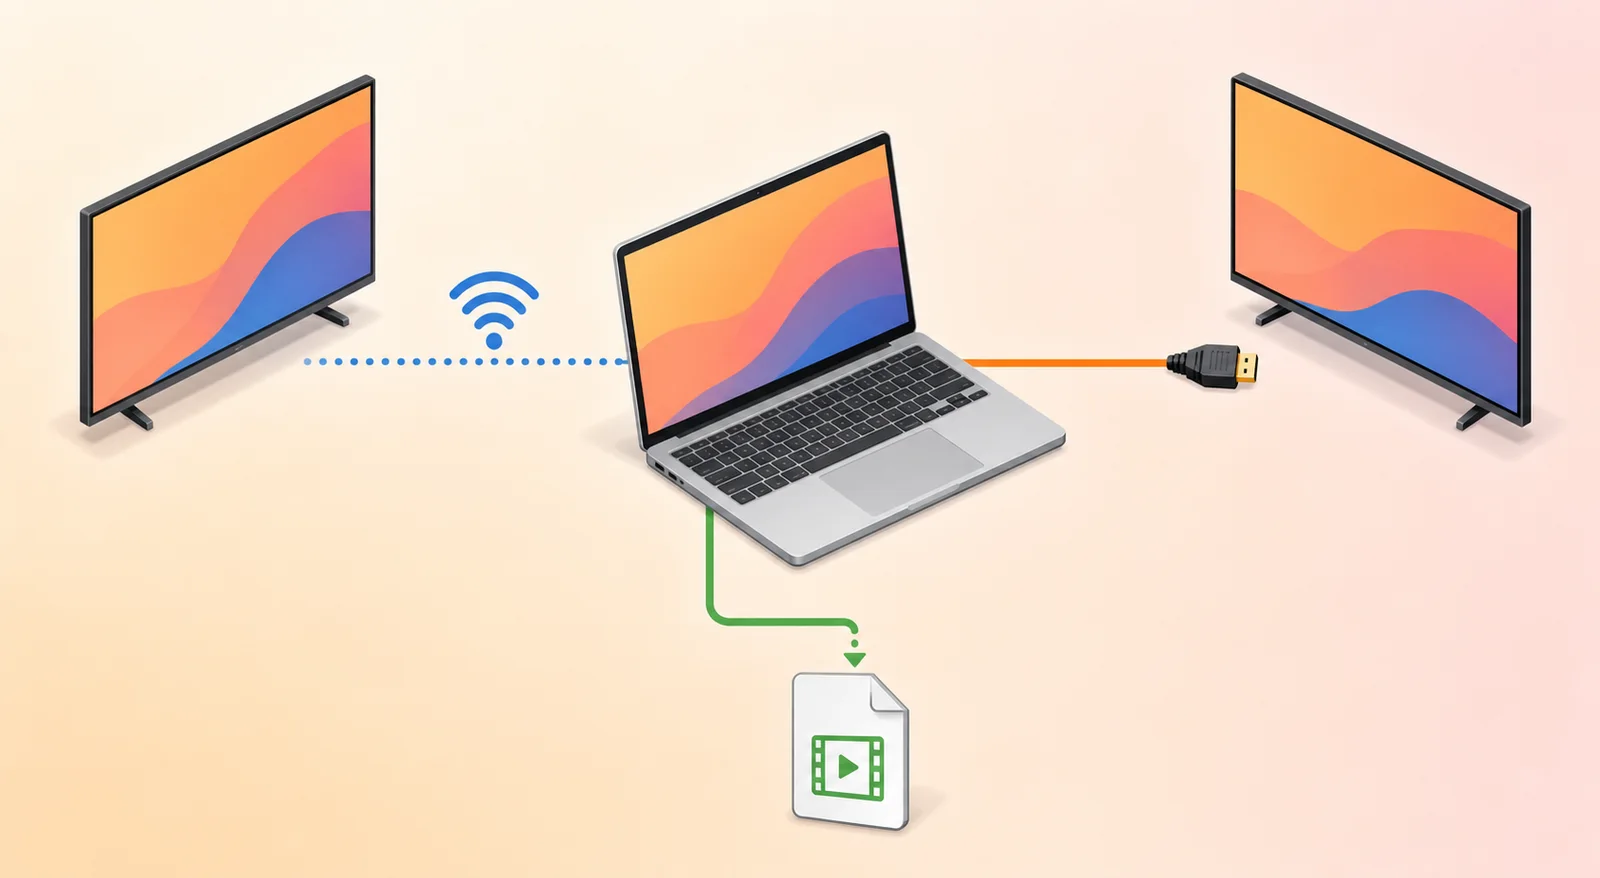
To mirror a Mac screen to Apple TV, connect the Mac and Apple TV to the same Wi-Fi network, open Control Center on the Mac, choose Screen Mirroring, and select the TV. Enter the four-digit code if one appears, then choose whether to share a window, mirror the Mac, or use the TV as an extended display.
If the TV does not support AirPlay, the network blocks device discovery, or the wireless connection keeps dropping, use an HDMI cable or the correct USB-C-to-HDMI adapter instead. Choose the path by the result you need:
| Goal | Best method | What the TV shows | Main constraint |
|---|---|---|---|
| Show everything exactly as it appears on the Mac | AirPlay screen mirroring | A live copy of the Mac display | Both devices need a compatible, stable network |
| Present one app without exposing the desktop | AirPlay window sharing | Only the selected window | Availability depends on the current Mac and receiver flow |
| Use the TV as more workspace | AirPlay extended display | A second desktop | Pointer and window placement require a short setup |
| Connect without relying on Wi-Fi | HDMI cable or adapter | A mirrored or extended wired display | The Mac, adapter, cable, and TV input must be compatible |
| Create a video file to send later | Screen recording | An MP4 file, not a live TV display | Recording is a different task from mirroring |
Before You Start
Run these checks before changing display settings:
- Turn on the Mac, Apple TV, or AirPlay-compatible smart TV.
- Put the Mac and receiver on the same Wi-Fi network.
- Install current software updates on both devices.
- Confirm that AirPlay receiving is enabled on the Apple TV or smart TV.
- Close private windows and notifications before mirroring the whole desktop.
- Decide whether you need a live display, a second display, or a video file.
Apple's current Mac AirPlay guide says devices should have Wi-Fi enabled and use the same network. When the devices belong to you, signing in with the same Apple Account can also make the connection easier.
Mirror the Mac with AirPlay
Use this route for an Apple TV or a smart TV that explicitly supports AirPlay:
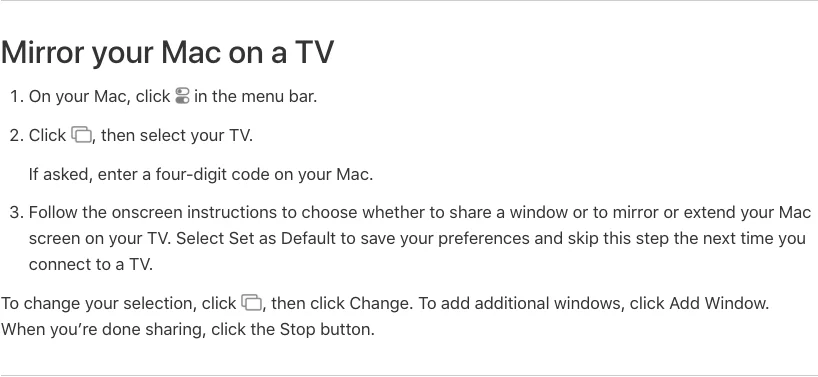
- Click Control Center in the Mac menu bar.
- Choose Screen Mirroring.
- Select the Apple TV or compatible smart TV.
- Enter the four-digit code shown on the TV if macOS asks for it.
- Choose Share a Window, Mirror, or Extend when that selection appears.
- Set the choice as the default only if it is the mode you want for future connections.
- When finished, return to Screen Mirroring and stop sharing.
Mirroring is the safest default when the audience must see exactly what you see. Window sharing is better for a presentation or product demo because it reduces the chance of exposing other apps. Extended display mode is useful when the TV should hold slides, a preview, or reference material while the Mac keeps the controls.
Do not confuse app-level video streaming with desktop mirroring. A video player may offer its own AirPlay button and send only that video to the TV. That can preserve desktop privacy and may be smoother than mirroring the entire Mac.
Connect the Mac with HDMI
Use HDMI when the TV is not AirPlay-compatible, the Wi-Fi network isolates devices, or a wired presentation is more reliable.
- Identify the video port on the Mac.
- Connect an HDMI cable directly, or use a compatible Thunderbolt or USB-C adapter.
- Select the matching HDMI input on the TV.
- On the Mac, open System Settings > Displays.
- Choose whether to mirror or extend the display.
- Adjust the resolution only if the picture looks soft, cropped, or oversized.
- If sound remains on the Mac, open System Settings > Sound > Output and select the TV or HDMI device.
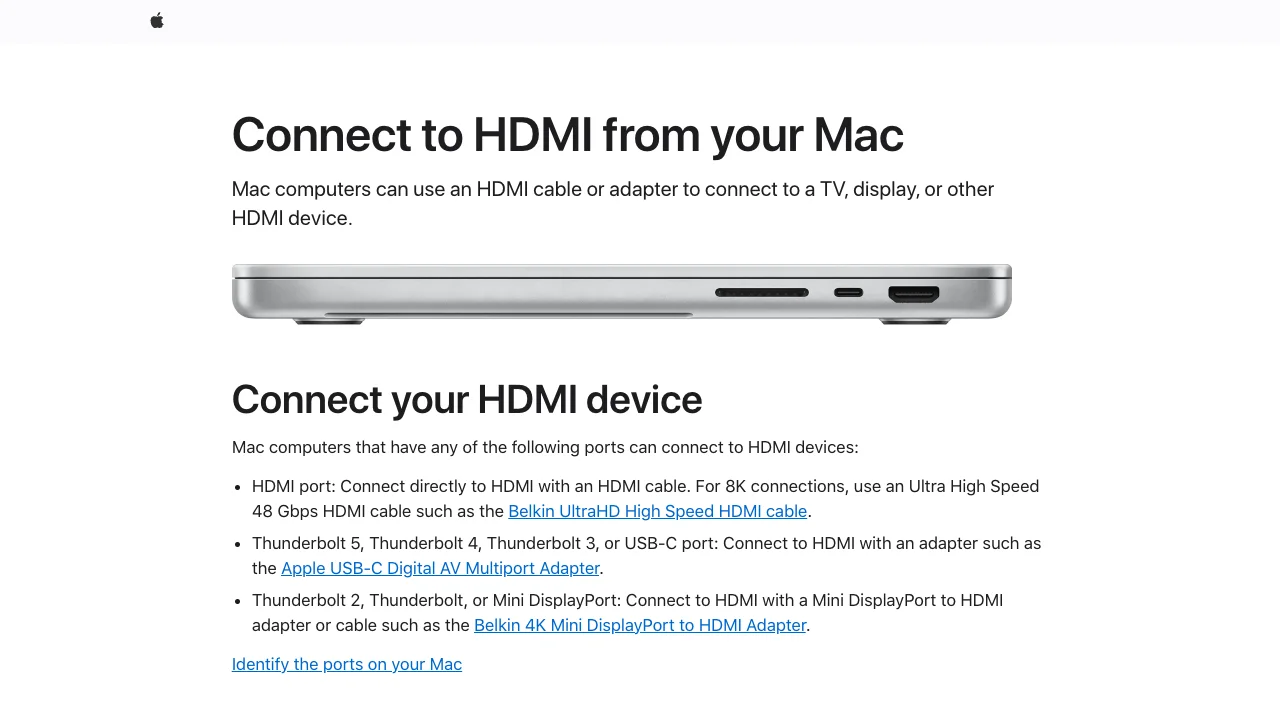
Apple's Mac HDMI support page distinguishes direct HDMI from Thunderbolt or USB-C adapter paths and recommends checking the adapter specifications. A cable that physically fits is not proof that it supports the resolution, refresh rate, audio, or HDCP path your content needs.
Fix AirPlay Mirroring Problems
Work through the failure in this order:
| Problem | Check first | Next action |
|---|---|---|
| The TV does not appear | Same Wi-Fi network, receiver powered on, AirPlay enabled | Move the devices closer, update them, and restart both |
| A code appears repeatedly | The code was entered on the Mac and the receiver allows this device | Review receiver access settings and Home restrictions |
| Mirroring starts but lags | Wi-Fi congestion and distance | Stop large downloads, move closer, or switch to HDMI |
| The picture is cropped | TV overscan and Mac display resolution | Adjust the TV picture mode or Mac display sizing |
| Video appears but audio stays on the Mac | The selected sound output | Choose the Apple TV, smart TV, or HDMI device in Sound settings |
| A protected video is blank | Content protection or app restrictions | Use the service's supported playback route; do not try to bypass protection |
| Mirroring works at home but not in a hotel or office | Guest-network client isolation | Ask for a presentation network or use HDMI |
Apple's AirPlay troubleshooting guide recommends checking proximity, software updates, the same Wi-Fi network, receiver settings, and device restarts. Change one variable at a time, then reconnect. That is faster than repeatedly opening and closing Control Center without knowing which layer failed.
If the TV is missing from Screen Mirroring
Confirm that the TV is an AirPlay receiver, not merely a device with an Apple TV app. Those are different capabilities. Then verify the TV's AirPlay setting, the active Wi-Fi name on both devices, and any Home access restrictions.
Guest and corporate networks often prevent one device from discovering another even when both show the same network name. HDMI is the predictable fallback when you cannot change the network.
If the picture lags or disconnects
Reduce the distance between the Mac, receiver, and wireless access point. Pause cloud backups, large downloads, and other high-bandwidth transfers. If the presentation cannot tolerate a drop, use HDMI rather than treating a crowded wireless network as a recorder problem.
If sound comes from the wrong device
AirPlay and HDMI can carry audio, but macOS still needs the intended output selected. Open System Settings > Sound > Output and choose the TV, Apple TV, or HDMI device. Check the TV volume and any connected receiver before changing unrelated Mac microphone settings.
Decide Whether You Need Mirroring or Recording
Mirroring is live. When you stop sharing, there is no file to send, edit, subtitle, or publish. Screen recording creates a file but does not put the Mac live on a television.
Use mirroring when:
- people are watching the Mac in the same room
- you need an extended display
- the audience should follow a live demonstration
- the content should not be saved
Use screen recording when:
- the tutorial must be watched later
- the clip needs narration, webcam, crop, zoom, or cursor emphasis
- the result must be uploaded, emailed, or added to documentation
- you need a repeatable product demo instead of a live connection
If the goal is a reusable Mac tutorial, the Mac screen recording with audio guide covers the recording path. If the source is an iPhone and the destination is a Mac, use the separate iPhone-to-Mac recording workflow; that is the opposite direction from mirroring a Mac to a TV.
Record the Mac When a Video File Is the Real Goal
Redol Screen Recorder does not mirror a Mac to Apple TV. It is a separate macOS tool for creating a local video file when live mirroring is the wrong output.
The current Redol product page positions the Apple Silicon Mac app for screen capture with system audio, microphone narration, and webcam overlay. It also describes crop and resize controls, zooms, cursor emphasis, and local MP4 export. The Windows client is planned, not available.
Create a shareable video instead of a live mirror
Use Redol Screen Recorder on an Apple Silicon Mac when the audience needs a local MP4 with system audio, narration, webcam, crop, zoom, or cursor emphasis.
Mac to TV Checklist
Before the presentation starts, confirm:
- the Mac and receiver are on the same Wi-Fi network
- AirPlay is enabled on the receiver
- the correct TV appears in Screen Mirroring
- window sharing, mirroring, or extended display matches the task
- private windows and notifications are hidden
- the TV is selected as the audio output when needed
- the picture fits the TV without unwanted cropping
- an HDMI cable and adapter are available for important presentations
- protected content is played only through a supported path
- screen recording is used only when the real deliverable is a video file
For most home and meeting-room setups, start with Control Center > Screen Mirroring and choose the TV. Keep HDMI as the reliability fallback. If the audience needs a file rather than a live display, stop mirroring and use a Mac recording workflow instead.
Related posts
About the Author

Zhang Guo
AI Product Manager · Digital Marketing Consultant
AI product manager and digital marketing consultant with a background in music. I see creativity as the bridge between rhythm and logic, where musical intuition and mathematical precision can coexist in every meaningful product decision.
Follow on X