Topic: Screen recording guides
If you need to know how to record your screen on Windows 10 with audio, start with Xbox Game Bar for an app or game, Clipchamp for a browser tab or narrated recording you want to edit, or PowerPoint for a selected area. The right option depends on what you are capturing and whether you need system sound, microphone narration, or both.
Record a ten-second sample before the real take. Play it back with headphones and check the picture, system audio, and microphone as separate signals. That small test catches most silent-recording problems before they ruin a long tutorial or meeting recap.
One security note matters in 2026: Microsoft says Windows 10 support ended on October 14, 2025. These recording methods can still work, but screen recording is not a substitute for upgrading or using an appropriate Extended Security Updates path on a machine that still needs Windows 10.
Choose the Right Windows 10 Recording Method
| Method | Best for | Audio you can capture | Main limitation |
|---|---|---|---|
| Xbox Game Bar | A game or one active app | System audio and optional microphone | Not a flexible full-desktop or selected-area recorder |
| Clipchamp | A browser tab, window, or screen recording that needs editing | Microphone; browser-tab audio in the personal version | System audio is not available for every capture scope |
| PowerPoint | A selected screen area when Microsoft Office is already installed | Computer audio and optional narration | Recording and export live inside a presentation workflow |
Use the built-in method that matches the job instead of installing several recorders at once. If you are still comparing software, the best free screen recorders without a watermark guide separates free-plan limits from recording features.
Before You Record Check the Audio Path
Prepare the screen and sound before choosing Record:
- Close private windows. Hide email, messages, password managers, customer data, and unrelated browser tabs.
- Silence notifications. Use Focus Assist or close apps that may show personal banners.
- Choose one microphone. Disconnect unused headsets and confirm the active input in Windows sound settings.
- Use headphones when possible. They reduce echo when system sound and microphone narration are recorded together.
- Check free storage. Long recordings can produce large video files even before editing.
- Decide the capture scope. One app, one tab, one window, the entire screen, and a selected area require different tools.
If the recording should show only one part of a desktop, review the partial-screen recording workflow before exposing the rest of the screen.
Method 1 Record an App with Xbox Game Bar
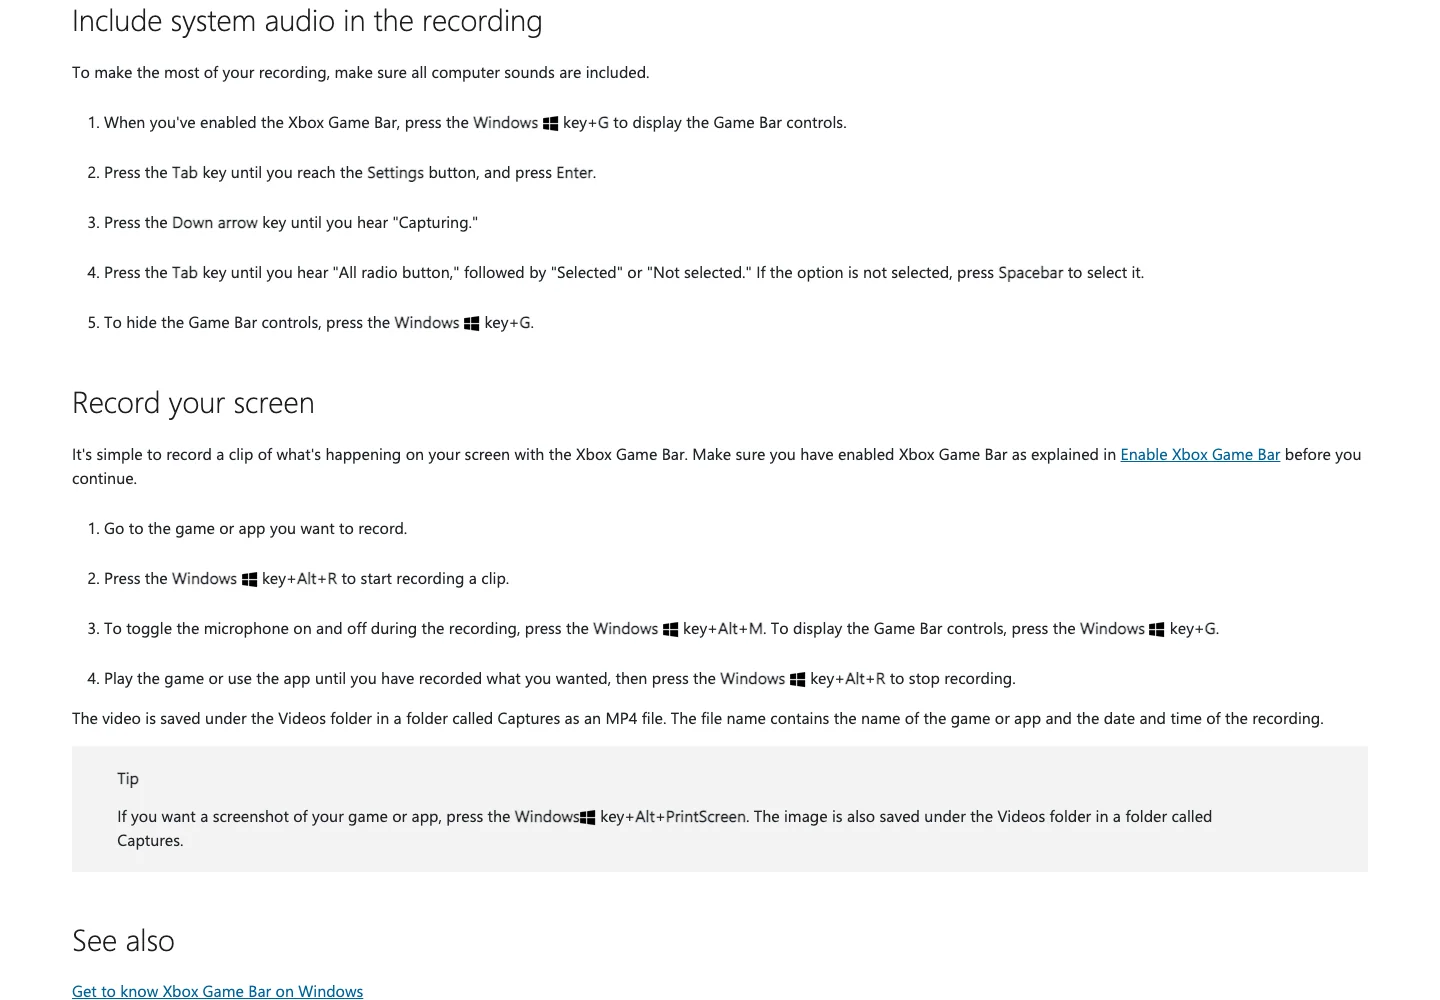
Xbox Game Bar is the fastest built-in choice for recording a game or a supported app with sound.
- Open the app or game you want to record.
- Press Windows + G to open Xbox Game Bar.
- Open Settings, choose Capturing, and select the audio option that includes the sounds you need. Choosing All includes system audio beyond the game itself.
- Press Windows + Alt + R to start recording.
- Press Windows + Alt + M if you need to turn the microphone on or off during the take.
- Press Windows + Alt + R again to stop.
- Open Videos > Captures to find the MP4 file.
Microsoft documents the Windows 10 controls and audio setting in its Xbox Game Bar screen-recording guide.
Game Bar is not the best choice for a workflow that jumps between the desktop, File Explorer, and several apps. Test the exact app first. If you need to capture a browser tab, an entire screen, or a recording that will be edited immediately, use Clipchamp instead.
Method 2 Record and Edit with Clipchamp
Clipchamp combines recording and basic editing in one Microsoft workflow. In the personal version, you can choose a browser tab, a window, or the entire screen, and you can record a microphone at the same time.
- Open Clipchamp and create a new video.
- Open Record & create, then choose Screen or Screen & camera.
- Allow browser access to the microphone if you want narration.
- Choose a browser tab, window, or entire screen.
- If you need tab audio, choose the browser-tab option and enable the shared-audio control in the picker.
- Start recording and complete the task.
- Stop the recording, add it to the timeline, make your edits, and export the finished video as MP4.
Microsoft's current Clipchamp screen-recording instructions note an important limitation for personal accounts: audio capture works with a browser tab, not every window or entire-screen capture. Do not assume that selecting the whole screen also captures all computer sound.
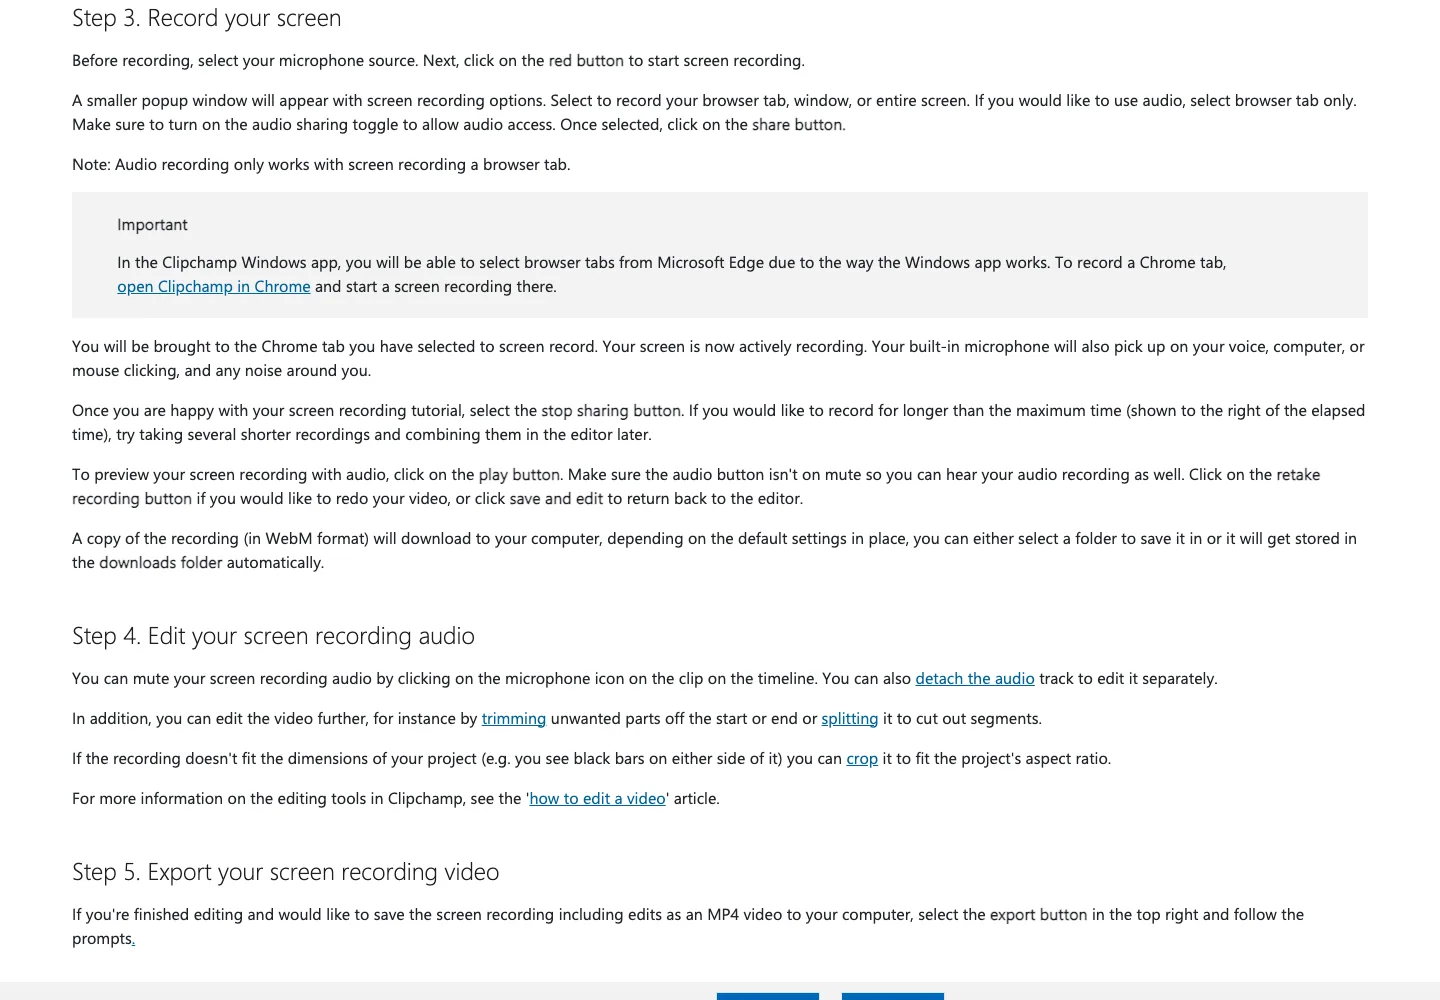
Clipchamp is the most practical of these three choices when the recording needs trimming, captions, overlays, or a quick MP4 export. It is less suitable when your only goal is a lightweight one-app capture with system sound.
Method 3 Record a Selected Area with PowerPoint
PowerPoint includes a screen recorder that can capture a selected area with audio. It is useful when Office is already installed and the recording will become part of a presentation or training deck.
- Open PowerPoint and choose the slide where you want to insert the recording.
- Select Insert > Screen Recording.
- Choose Select Area and drag over the region you want to capture.
- Leave Audio selected if you need sound. Pointer recording is also enabled by default.
- Choose Record, complete the action, and stop the capture.
- To save a standalone file, right-click the recording on the slide and choose Save Media As.
The current Microsoft PowerPoint screen-recording guide shows the selected-area, audio, pointer, and media-export controls.
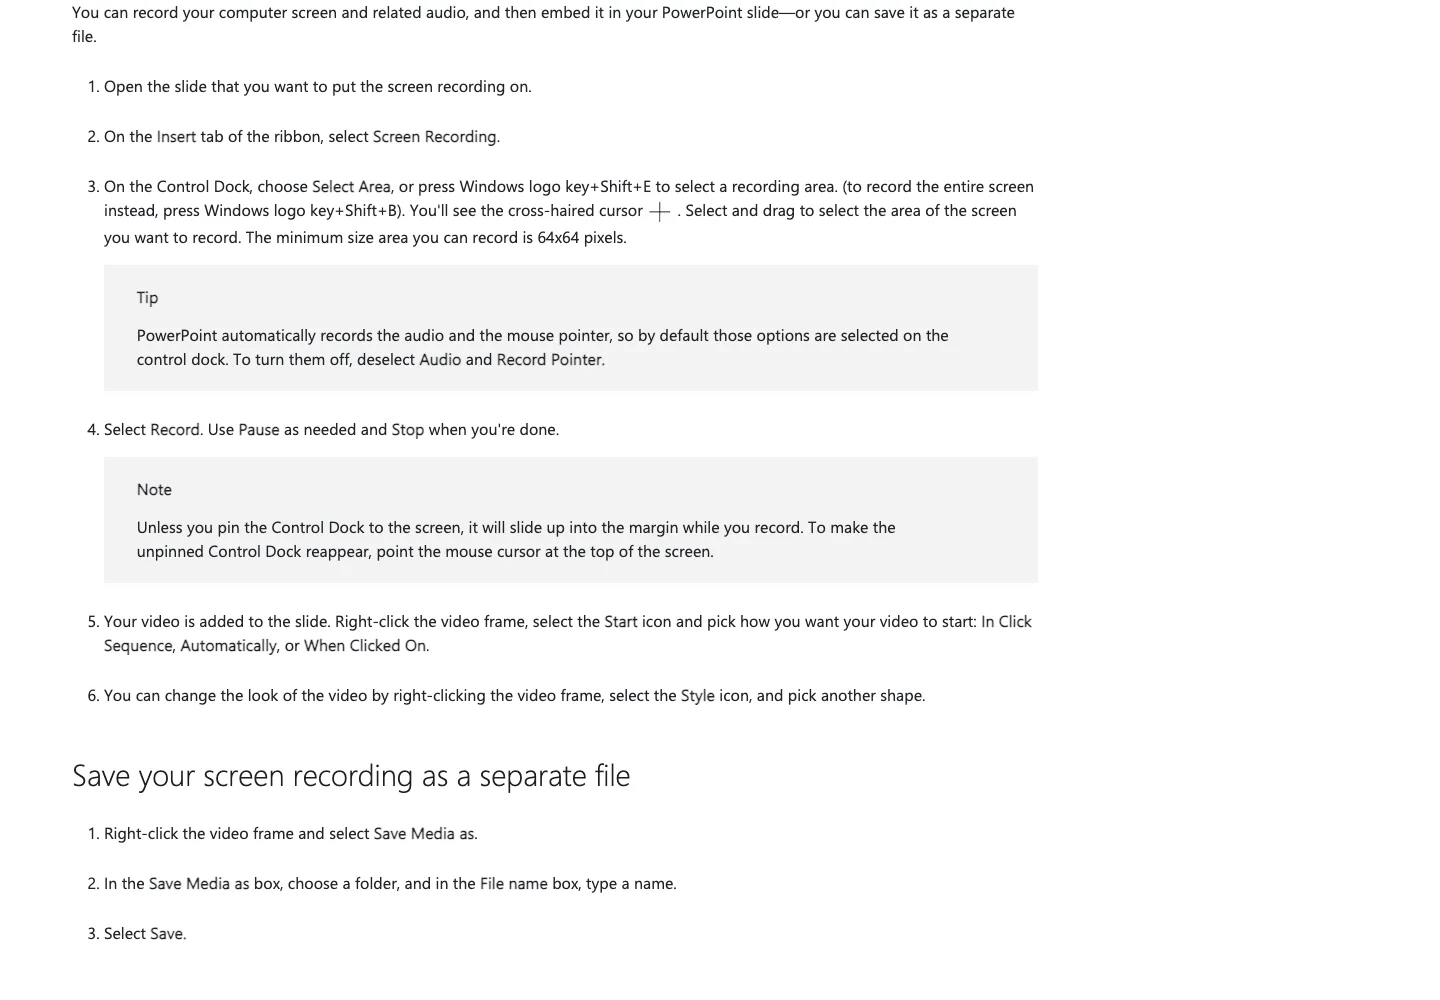
PowerPoint is a good fit for a focused software demonstration. It is a poor fit if you do not already use Office or if you want a recorder built around repeated standalone video production.
Fix Missing or Bad Recording Audio
| Problem | Check first | Next step |
|---|---|---|
| Game Bar records the picture but not system sound | Xbox Game Bar Settings > Capturing audio selection | Choose the audio scope you need, then make a new test recording |
| Clipchamp records narration but not computer sound | The capture scope | Choose a browser tab and enable shared tab audio; the personal version does not capture audio for every scope |
| PowerPoint produces a silent recording | Whether Audio was selected before Record | Repeat a short capture with Audio enabled |
| Microphone narration is missing | Windows microphone permission and active input device | Allow access, select the intended mic, and record one spoken sentence |
| Voice echoes or sounds doubled | Speakers feeding back into the microphone | Use headphones and keep only one microphone active |
| Recording stops after switching apps | The recorder is tied to one app or capture target | Use a broader Clipchamp scope or plan separate clips |
| The result is blank or protected content is missing | The app or service restricts capture | Respect the restriction; changing recorders may not make protected media recordable |
Do not troubleshoot a twenty-minute recording. Reproduce the problem in ten seconds, change one setting, and test again. That makes it clear whether the failure belongs to the system-audio path, the microphone path, or the selected capture scope.
Why the Capture Scope Matters More Than the Tool Count
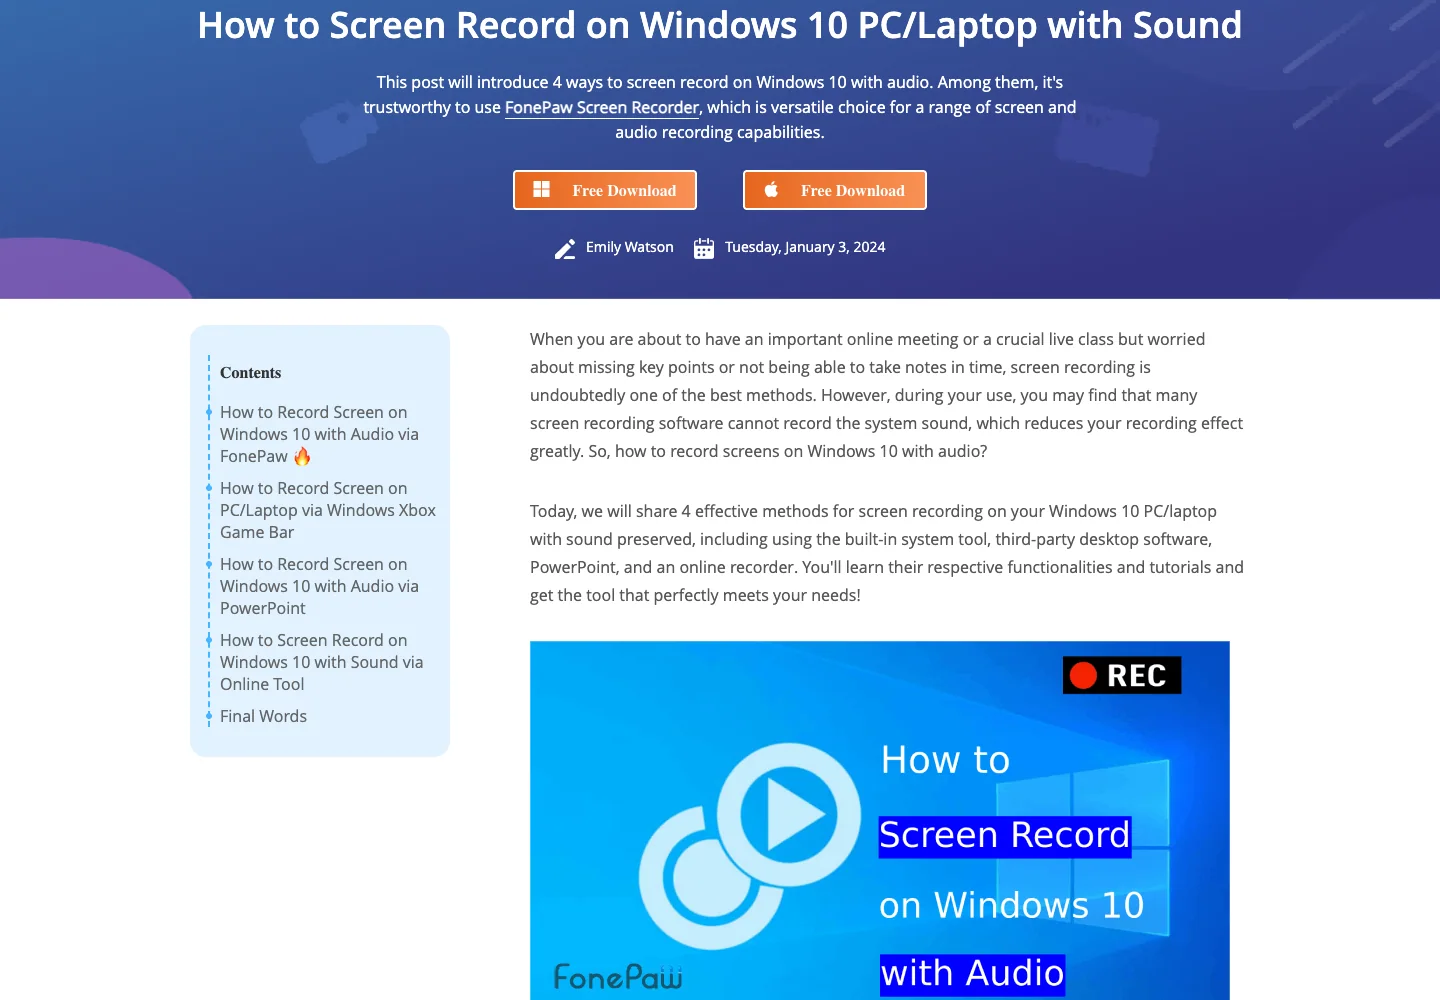
The competing FonePaw page behind this topic separates four methods: a dedicated recorder, Xbox Game Bar, PowerPoint, and an online tool. That structure is useful, but its public page was last updated in January 2024 and leads with the publisher's own Windows recorder. You can review the original FonePaw Windows 10 recording article for context.
The more durable decision is not “which page lists the most tools?” It is “which capture scope and audio route match this recording?” This guide uses current Microsoft support material, accounts for Windows 10's end-of-support status, and states where system audio is unavailable instead of treating every recorder as interchangeable.
If You Record on a Mac Instead
Redol Screen Recorder is not a Windows recorder. It currently supports Apple Silicon Macs, so it should only be used for a separate Mac segment in a cross-device tutorial, product demo, course lesson, or support video.
The current Redol workflow can capture a Mac screen with system audio, microphone narration, and a webcam overlay, then add crop and resize controls, zooms, and cursor emphasis before local MP4 export. For the complete desktop workflow, see how to screen record on Mac with audio.
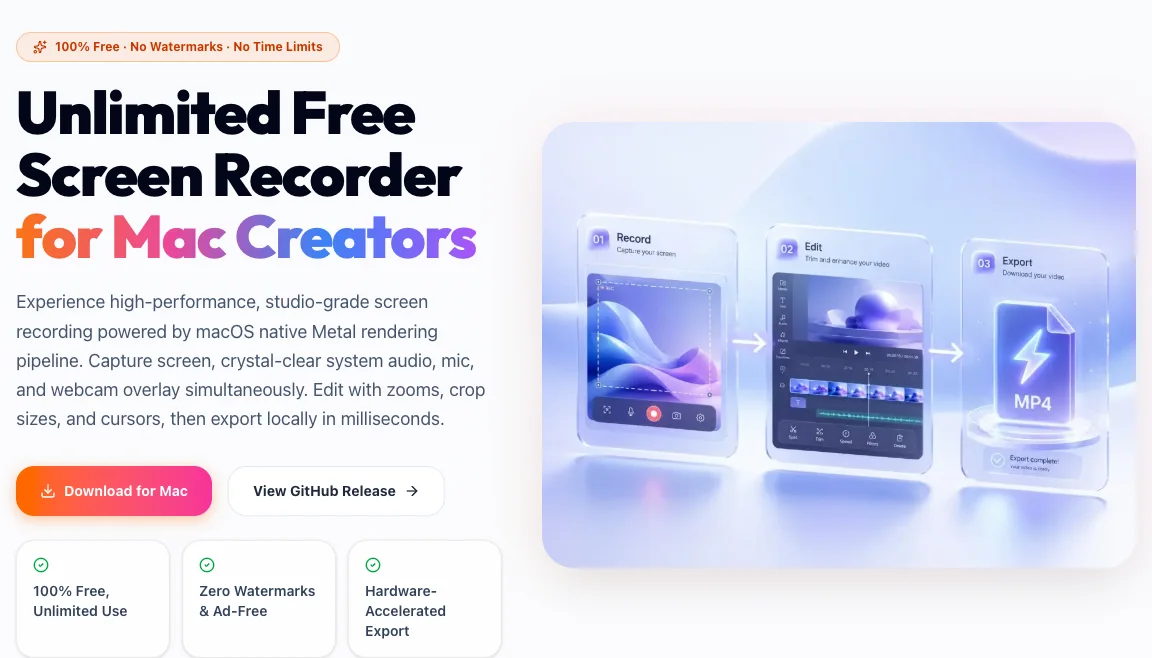
Record the Mac part of a cross-device tutorial
Use Redol Screen Recorder on an Apple Silicon Mac for a separate desktop segment with system audio, microphone narration, editing controls, and local MP4 export.
Windows 10 Recording Checklist
Before you share the finished video, confirm:
- the recorder matches the app, tab, window, screen, or selected area you need
- system sound and microphone narration were tested separately
- notifications and private data are absent
- headphones prevented speaker-to-microphone echo
- the final recording was played from beginning to end
- protected or restricted content was not treated as a recorder failure
- the MP4 was saved somewhere you can find and back up
- the Windows 10 device has an appropriate security or upgrade plan
For most Windows 10 users, the fastest reliable answer is Xbox Game Bar for one app, Clipchamp for a browser-led recording that needs editing, and PowerPoint for a selected-area capture. Choose the scope first, record a ten-second test, and only then start the full take.
Related posts
About the Author

Zhang Guo
AI Product Manager · Digital Marketing Consultant
AI product manager and digital marketing consultant with a background in music. I see creativity as the bridge between rhythm and logic, where musical intuition and mathematical precision can coexist in every meaningful product decision.
Follow on X