To screen record on Windows 11 with audio, use Snipping Tool for a selected region, Xbox Game Bar for one game or app, or Clipchamp when you also need a browser-led editing workflow. Windows 11 can record system sound and microphone narration, but the audio path and capture scope depend on the method.
Before the real take, record ten seconds while an app plays sound and you say one sentence. Play the clip back with headphones. Confirm the picture, system audio, and microphone as three separate signals before recording anything long.
Choose the Right Windows 11 Recording Method
| Method | Best for | Audio path | Main limitation |
|---|---|---|---|
| Snipping Tool | A selected region and quick MP4 capture | PC audio, microphone, or both | Limited editing and a fixed capture region |
| Xbox Game Bar | One game or supported app | System audio plus optional microphone | Not a flexible full-desktop recorder |
| Clipchamp | Browser-led capture that needs editing | Microphone and supported shared audio | Audio availability changes with the selected share scope |
If you only need a quick region, start with Snipping Tool. If the recording stays inside one app or game, Game Bar is faster. Choose Clipchamp when trimming, captions, overlays, or timeline editing matter more than the fewest clicks.
Method 1 Record a Region with Snipping Tool
Snipping Tool is the most direct built-in Windows 11 option for recording a selected part of the screen.
- Press Windows + Shift + R to open the recording capture bar.
- Drag over the region you want to record.
- Check the PC-audio and microphone controls before starting.
- Start the recording and complete the task inside the selected region.
- Stop, preview the clip, and save the MP4.
- Play the saved file once and confirm both audio channels.
Microsoft's current Windows keyboard shortcut reference identifies Windows + Shift + R as the shortcut for selecting a region to record. Microsoft also says current Snipping Tool recording can include PC audio and microphone voice-over in its Windows 11 feature announcement.

Snipping Tool works best when the important action stays inside one stable rectangle. If a menu opens outside that rectangle, a window moves, or the workflow crosses multiple displays, the missing area will not appear in the recording. Rehearse the motion once before you start.
If Windows + Shift + R does nothing, update Snipping Tool through Microsoft Store, run Windows Update, and open the app directly to check whether the Record control is present. Do not confuse Windows + Shift + S, which opens screenshot capture, with the recording shortcut.
Method 2 Record an App with Xbox Game Bar
Xbox Game Bar is useful when the recording stays inside one game or supported app and system audio matters.
- Open the game or app you want to capture.
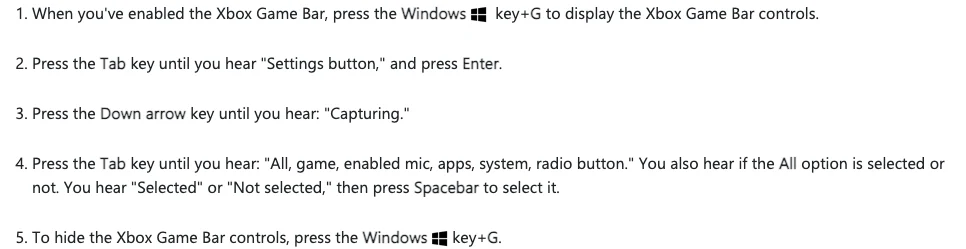
- Press Windows + G to open Game Bar.
- Open Settings > Capturing and choose the audio scope you need. Selecting All includes app and system sounds.
- Press Windows + Alt + R to start recording.
- Press Windows + Alt + M to toggle the microphone during the take.
- Press Windows + Alt + R again to stop.
- Find the MP4 under Videos > Captures.
The current Microsoft Game Bar recording guide documents the system-audio selection, recording shortcut, microphone shortcut, and Captures folder for Windows 11 and Windows 10.
Game Bar is not the best fit for a tutorial that moves through the desktop, File Explorer, several apps, and system dialogs. Its strength is a focused app or game capture. If your recording stops after switching windows, treat that as a scope mismatch and use Snipping Tool, Clipchamp, or another recorder designed for a broader target.
Method 3 Record and Edit with Clipchamp
Clipchamp is the practical choice when you want recording and editing in one workflow.
- Open Clipchamp and create a new video.
- Choose Record & create, then select Screen or Screen & camera.
- Allow microphone access if you need narration.
- Choose a browser tab, window, or entire screen.
- If you need shared audio, verify that the selected capture scope offers it.
- Record a short sample, stop, and add it to the timeline.
- Trim, add captions or overlays, and export the finished MP4.
Microsoft's Clipchamp screen-recording instructions make the key distinction: audio capture is tied to the selected sharing mode. In the personal version, browser-tab audio is supported, but you should not assume every window or entire-screen selection also carries computer audio.
Use Clipchamp when the final video needs editing. Use Snipping Tool or Game Bar when you only need a fast local clip and do not want to build a timeline.
Fix Windows 11 Screen Recording Audio Problems
| Problem | Check first | Next step |
|---|---|---|
| Video is clear but system audio is silent | The recorder's audio scope | Enable PC/system audio or choose the All Game Bar capturing option |
| Microphone is missing | Windows microphone permission and active input | Select the intended mic and record one spoken sentence |
| Voice echoes or sounds doubled | Speakers feeding back into the microphone | Use headphones and keep only one microphone active |
| Snipping Tool shortcut does nothing | App and Windows update status | Update Snipping Tool, then open Record directly in the app |
| Game Bar stops after an app switch | The app-bound capture target | Use a broader region or screen capture method |
| Clipchamp captures narration but not computer sound | Browser tab, window, or screen selection | Retry with a browser tab and enable shared audio when offered |
| Recording is blank or protected media is missing | App or service capture restrictions | Respect the restriction; another recorder may not make protected content recordable |
Change one setting at a time and repeat the ten-second test. Troubleshooting a short sample makes it obvious whether the failure belongs to the capture scope, system-audio path, microphone path, or protected content.
Prepare the Screen Before Recording
Screen recording can expose more than the intended demo. Use this checklist before pressing Record:
- close email, messages, password managers, customer data, and unrelated tabs
- enable Do Not Disturb or silence notifications
- choose one microphone and disconnect unused headsets
- use headphones when capturing system sound and narration together
- check free storage and the destination folder
- rehearse menus that may open outside a selected region
- enlarge important text and the cursor before recording
- avoid entering passwords or security codes on camera
For a smaller capture area, the partial-screen recording guide explains how to reduce accidental oversharing. If you are choosing software instead of a built-in method, compare desktop screen recorders by capture scope, not by feature count alone.
What the Competitor Page Gets Right and Misses
The FonePaw page behind this opportunity is clearly a Windows 11 support article. It separates Snipping Tool, Xbox Game Bar, FonePaw Screen Recorder, and PowerPoint, proving that searchers want method selection rather than a single product landing.

You can inspect the original FonePaw Windows 11 recording article. Its public page still points readers through the screenshot shortcut before recording, while Microsoft's current shortcut reference gives Windows + Shift + R as the direct recording entry. This guide also separates PC audio from microphone narration and adds a reproducible test instead of assuming that a visible waveform means every signal is present.
If You Also Record on a Mac
Redol Screen Recorder is not a Windows recorder. It is currently focused on Apple Silicon Macs, so use it only for a separate Mac segment in a cross-device tutorial, product demo, course, or support video.
The current Redol product page says it can capture the Mac screen, system audio, microphone narration, and a webcam overlay, then apply crop and resize controls, zooms, and cursor emphasis before local MP4 export. Recording and export happen locally on the Mac.
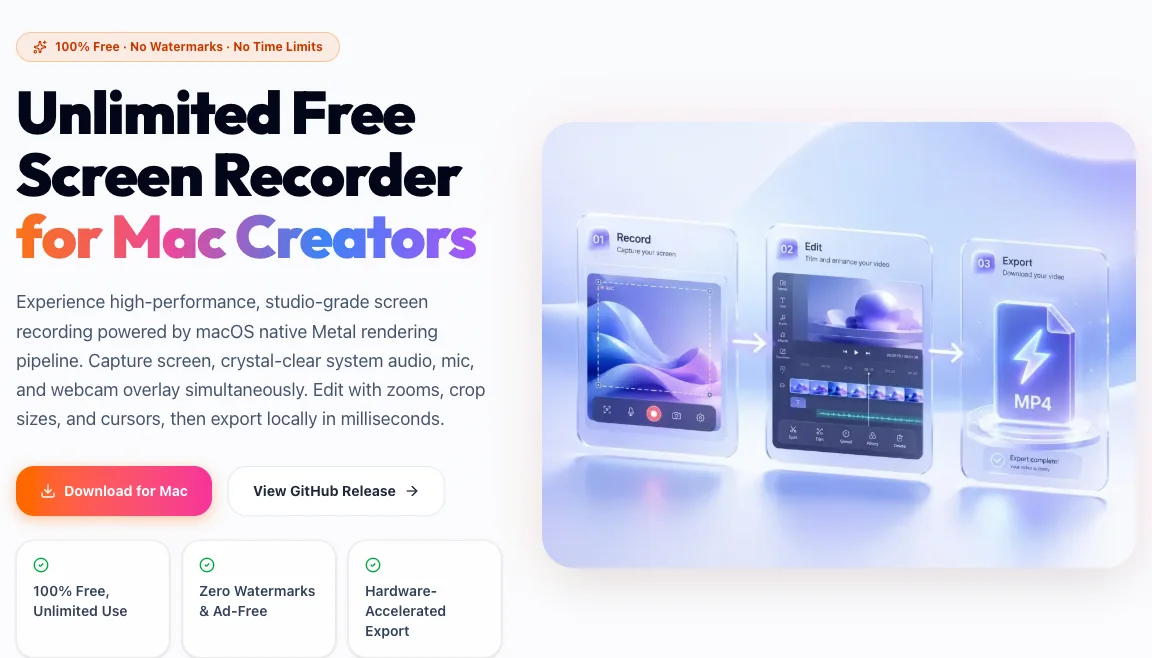
Record the Mac part of a cross-device tutorial
Use Redol Screen Recorder on an Apple Silicon Mac for a separate local capture with system audio, microphone narration, webcam overlay, and MP4 export.
Windows 11 Recording Checklist
Before sharing the finished video, confirm:
- the method matches the region, app, game, tab, window, or screen you need
- system sound and microphone narration were tested separately
- notifications and private information are absent
- the selected region includes every menu and dialog viewers need
- the saved MP4 plays from beginning to end
- protected content was not treated as an ordinary recorder failure
- captions or a transcript are available when accessibility matters
For most Windows 11 users, Snipping Tool is the fastest selected-region recorder, Xbox Game Bar is the fastest focused app or game recorder, and Clipchamp is the better recording-plus-editing workflow. Choose the capture scope first, test all three signals, and only then record the full session.
Related posts
About the Author

Zhang Guo
AI Product Manager · Digital Marketing Consultant
AI product manager and digital marketing consultant with a background in music. I see creativity as the bridge between rhythm and logic, where musical intuition and mathematical precision can coexist in every meaningful product decision.
Follow on X