The quickest way to record your phone screen is to use the recorder built into iPhone or Android. Choose computer mirroring instead when phone storage is tight, the phone needs to appear inside a desktop tutorial, or you want to combine the phone view with microphone narration and desktop editing.
Do a 10-second test before recording anything important. Confirm the picture, the exact audio source, notification privacy, orientation, and saved file. A recording workflow that looks correct but exports silent video is not ready.
Choose native recording or computer mirroring
| Your main requirement | Best starting method | Why it fits | Check before a long take |
|---|---|---|---|
| Fast app demo saved on the phone | Native iPhone or Android recorder | No computer or mirroring setup | Microphone state, app audio, notifications, free storage |
| Longer recording without filling phone storage | Mirror to a computer, then record the computer window | The final file can stay on the computer | Mirroring stability, audio route, computer disk space |
| Phone steps inside a desktop tutorial | Mirror to a computer | Keeps the phone and desktop in one production workflow | Window size, cursor visibility, private notifications |
| Voice explanation over the phone screen | Native recorder with microphone, or computer capture with a separate mic | Lets you match narration to the workflow | Voice level, echo, phone speaker leakage |
| Protected streaming or security-sensitive app | Do not assume recording will work | Apps and services can restrict capture or show a blank frame | Test the exact screen and respect the service policy |
Record an iPhone screen natively
Apple's current iPhone screen recording guide places Screen Recording in Control Center. The built-in path is the right default for a short walkthrough, app tutorial, bug report, or proof of a mobile flow.
- Open Control Center from the top-right of the screen.
- If Screen Recording is missing, add it from the Control Center controls gallery.
- Tap the Screen Recording control and wait for the countdown.
- Complete the task you want to show.
- Tap the red recording indicator, then stop the recording.
- Open Photos and review the video before sharing it.
To add your voice, press and hold the Screen Recording control before starting, then enable Microphone. That microphone captures narration and nearby sound; it is not a guarantee that every app's protected or internal audio will be available.
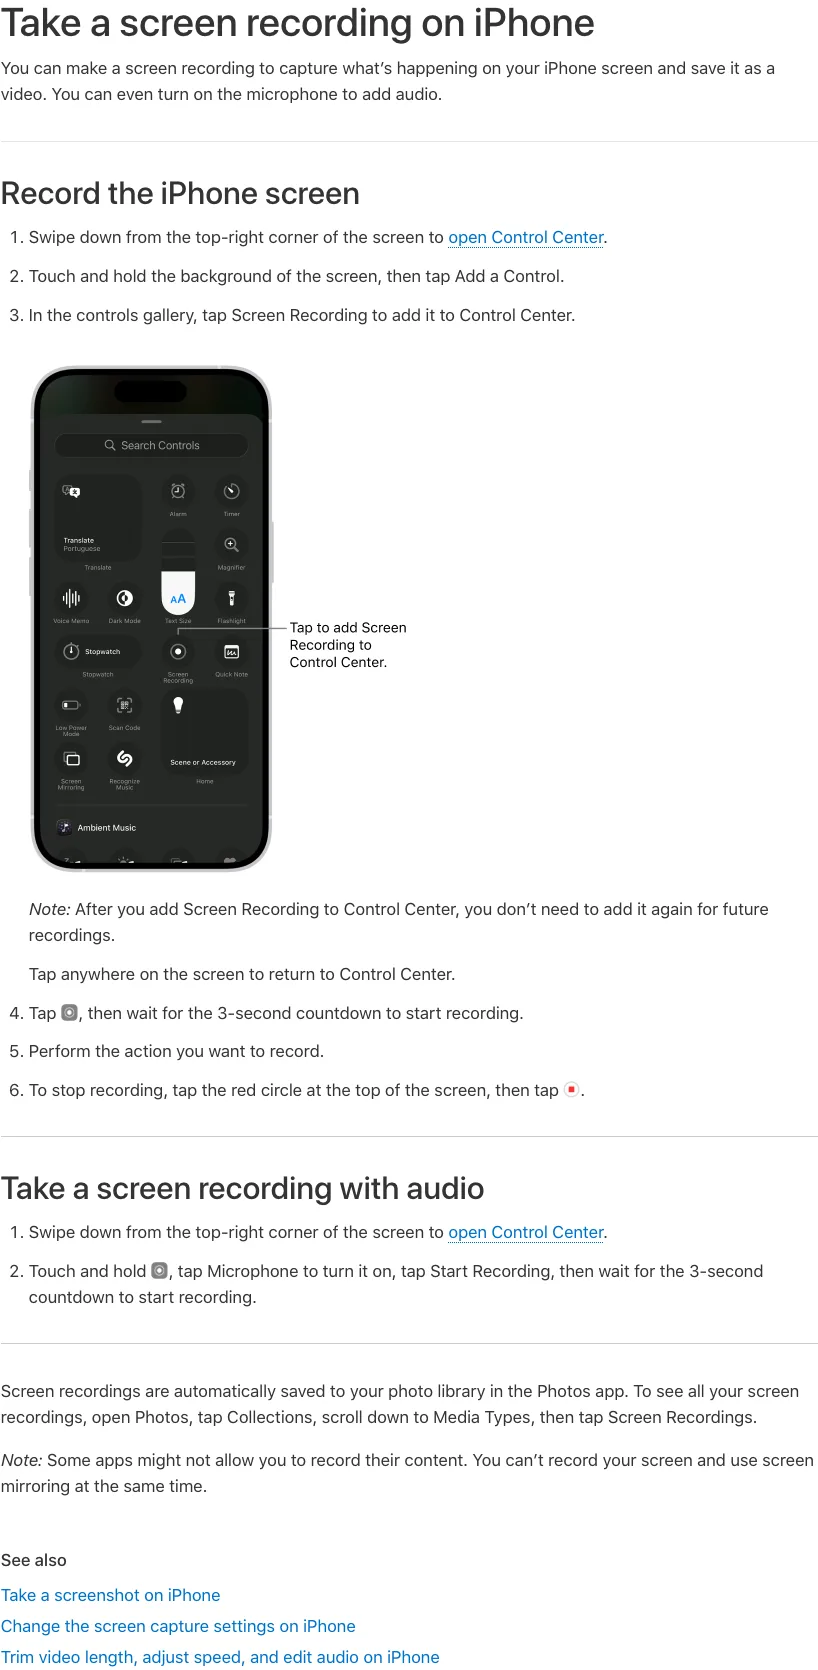
Apple also notes that some apps may block recording and that iPhone screen recording cannot run at the same time as screen mirroring. If your production plan depends on a mirrored iPhone window, record that window on the computer instead of starting both capture paths on the phone.
For a platform-specific walkthrough, use the existing iPhone screen recording guide.
Record an Android screen natively
Google's current Android screen recording instructions use the Screen recorder tile in Quick Settings. Menu names and available audio choices can vary by phone maker, but the basic workflow is consistent on supported devices.
- Swipe down twice to open the full Quick Settings panel.
- Tap Screen recorder. If it is missing, edit Quick Settings and add the tile.
- Choose whether to record audio and show touches.
- Tap Start and wait for the countdown.
- To stop, open notifications and tap the Screen recorder notification.
- Find the video in Photos or the phone maker's Gallery app.
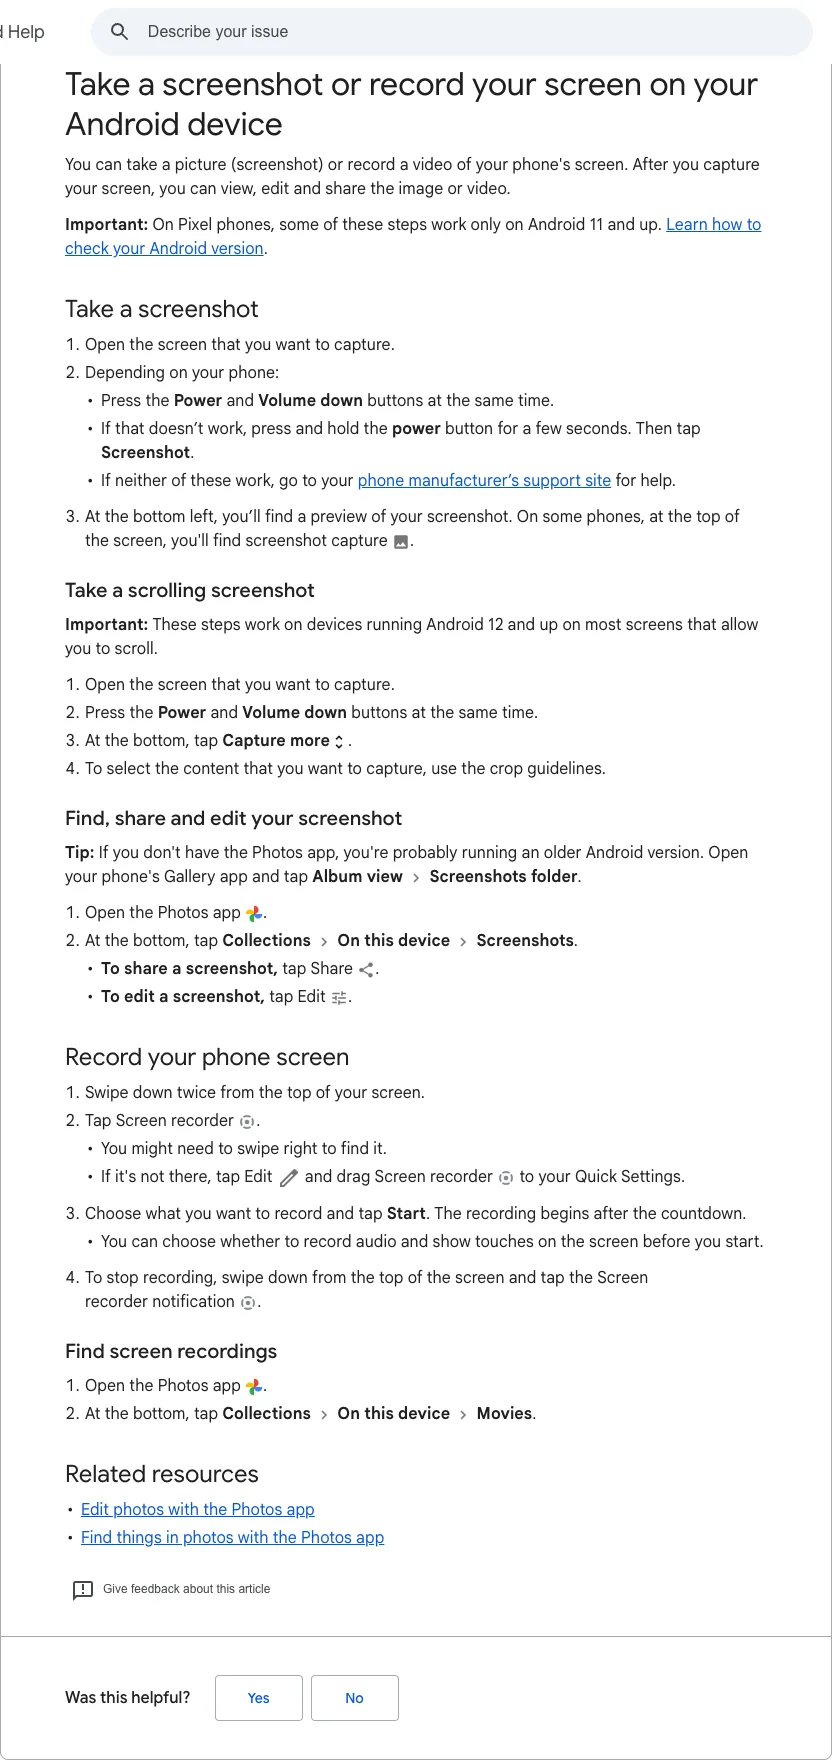
Google documents the standard path for Pixel and Android, but older devices and manufacturer skins may use different controls. If the tile does not exist, check the phone maker's support page before installing an unfamiliar recorder. Also test whether the selected audio option means device audio, microphone, or both; those labels are not universal.
The existing Android recording without root guide covers device support and safer fallback choices in more detail.
Record a phone screen through a computer
Computer capture is a two-part workflow:
- Mirror or display the phone on the computer. This step is handled by Apple, Microsoft, a phone maker, or a third-party mirroring tool.
- Record the displayed window on the computer. This step is handled by a desktop screen recorder.
Keeping those jobs separate prevents a common mistake: installing a desktop recorder and expecting it to discover a phone automatically.
Mirror an iPhone to a Mac
Apple's iPhone Mirroring documentation supports controlling a nearby iPhone from a compatible Mac. The current requirements include iOS 18 or later, macOS Sequoia 15 or later, the same Apple Account with two-factor authentication, and nearby devices with Wi-Fi and Bluetooth enabled. Availability varies by region, and Apple currently says iPhone Mirroring is unavailable in the European Union.
For view-only mirroring, Apple's AirPlay workflow can display an iPhone on a Mac or compatible display. Once the phone appears in a Mac window, capture that window or a selected region on the Mac. Test audio separately: seeing the phone image does not prove that the desired app audio is present in the recording.
For a dedicated cable and QuickTime path, see how to record an iPhone screen on Mac.
Display an Android phone on Windows
Microsoft's Phone Link phone screen guide supports selected Android devices in selected markets. Microsoft currently lists Android 10 or later, a supported phone with Link to Windows, the same Wi-Fi network, and a compatible Windows PC as core conditions.
Phone Screen is not universal Android mirroring. Verify the supported-device list before designing a workflow around it, and treat the displayed phone as the input to a separate Windows recording tool.
Understand the competitor workflow
The reviewed FonePaw phone recorder guide packages mirroring and desktop capture into one product flow. Its public page separates iPhone and Android setup, offers Wi-Fi or USB paths for Android, and calls out phone storage as a reason to save the recording on a computer.
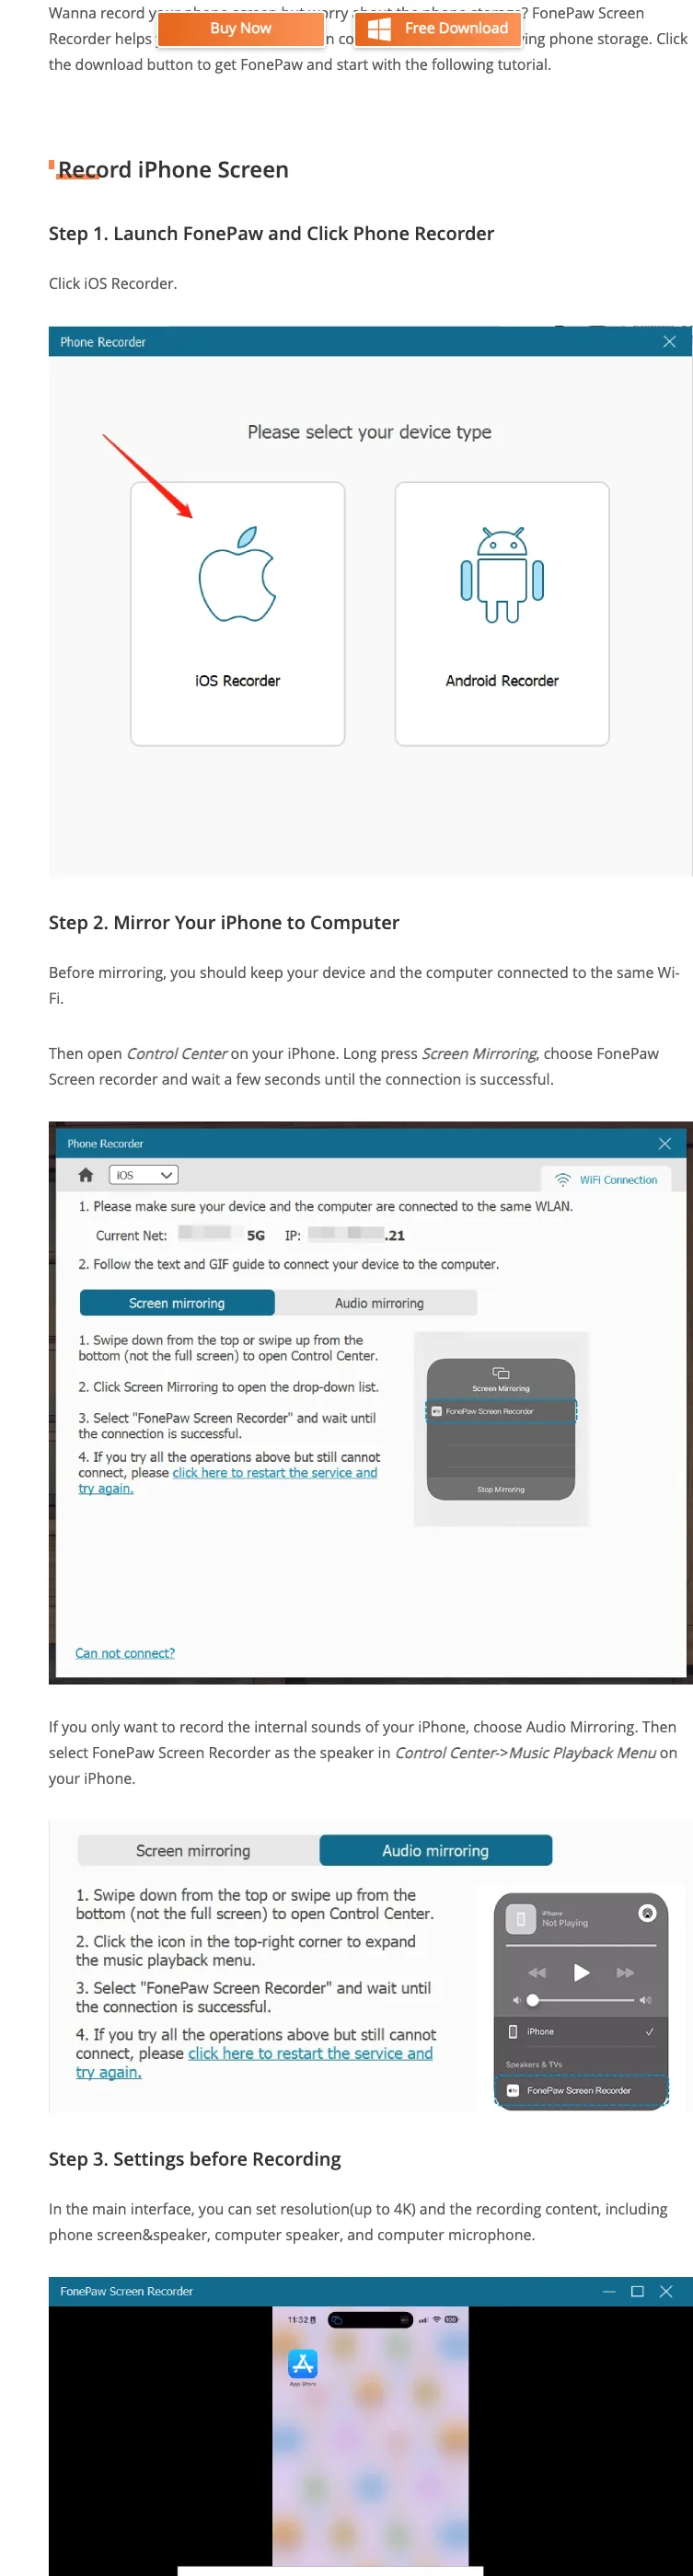
That competitor page proves the demand for a computer-based method, but it should not be copied as a universal recipe. The stronger decision is to choose a mirroring method that your phone and computer officially support, then choose the recorder based on audio, privacy, file ownership, and editing needs.
Use Redol for a mirrored phone window on Mac
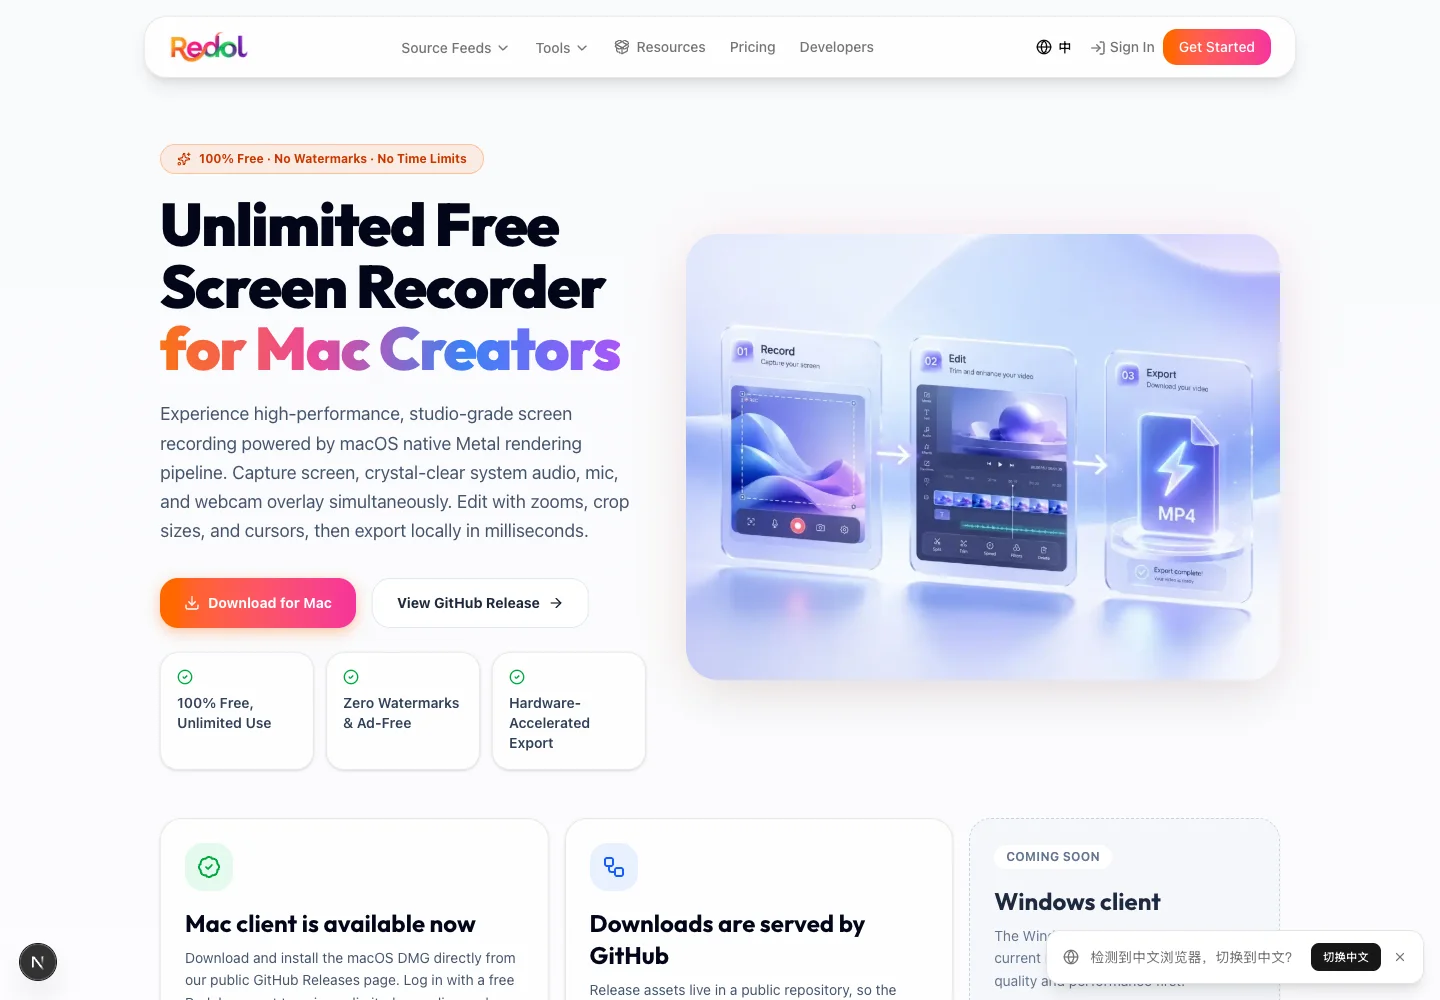
Redol Screen Recorder does not mirror an iPhone or Android phone. It becomes relevant only after a supported mirroring method has already placed the phone screen in a Mac window.
At that point, Redol Screen Recorder can capture the Mac screen or selected area with system audio, microphone narration, and an optional webcam overlay. The current product page also documents crop and resize controls, zooms, cursor emphasis, quick editing, and local MP4 export. The live client is currently for Apple silicon Macs; Windows and Intel Mac availability should not be implied.
Use this sequence:
- Start the supported phone mirroring method.
- Resize the phone window and hide private notifications.
- In Redol, select the window or a clean custom area around it.
- Choose system audio, microphone, or both.
- Record 10 seconds and play back the local MP4.
- Only then record the full tutorial or demo.
Record the phone window already visible on your Mac
Use Redol for local Mac capture, narration, framing, quick edits, and MP4 export after a supported mirroring method is connected.
Fix audio, black frames, and failed recordings
The video has no sound
- Confirm whether the recorder is set to device/system audio, microphone, or both.
- If mirroring to a computer, verify that the phone audio is actually playing through the computer.
- Use headphones while testing narration to reduce echo and speaker leakage.
- Record and replay 10 seconds before the full take.
The mirrored recording is black
- Test an ordinary Settings or home-screen view first.
- Protected video, banking, password, and security-sensitive apps may restrict capture.
- Do not use a workaround to bypass content protections.
- If every app is black, check the mirroring connection, capture permissions, and selected window.
The recording stops or stutters
- Free storage on the device that saves the final file.
- Close high-load apps on the phone and computer.
- Keep Wi-Fi mirroring devices near the same access point, or use an officially supported cable path.
- Reduce the mirrored window or recording resolution before sacrificing audio reliability.
Private content appears in the video
- Enable Do Not Disturb or a Focus mode.
- Close messages, password managers, customer data, and authentication prompts.
- Crop the recording area to the phone window.
- Review the complete export before publishing.
Phone screen recording checklist
Before the final take, confirm:
- Native recording or computer mirroring is the better fit for this job.
- The exact app or screen permits recording.
- Device audio, microphone, or both are selected intentionally.
- Notifications and private data are hidden.
- Portrait or landscape orientation matches the final channel.
- The saving device has enough free storage.
- A 10-second test has correct picture and sound.
- The final file opens, plays, and can be found again.
For most people, native recording is the right first move. Choose computer mirroring when the phone needs to become one element in a larger desktop production workflow, and use Redol only where its current Mac recording capabilities genuinely fit.
Related posts
About the Author

Zhang Guo
AI Product Manager · Digital Marketing Consultant
AI product manager and digital marketing consultant with a background in music. I see creativity as the bridge between rhythm and logic, where musical intuition and mathematical precision can coexist in every meaningful product decision.
Follow on X