You usually do not need root access to record an Android screen. Start with the recorder built into your phone: open Quick Settings, choose Screen record, select the audio and touch options you need, and begin after the countdown. If the control is missing, check the Quick Settings edit panel and your phone maker's current support instructions before installing another app.
That built-in-first path is the safest answer for most people searching for a screen recorder for Android without root. It avoids changing the operating system, keeps the permission prompt visible, and is less likely to turn a simple recording job into a device-recovery problem.
Use the Built-In Android Recorder First
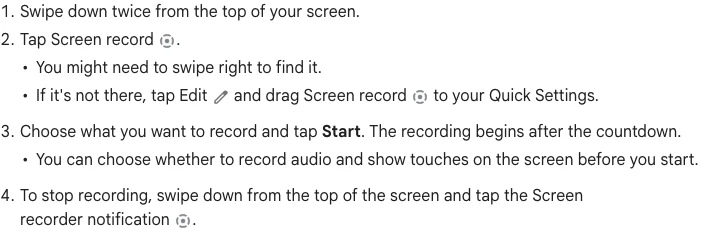
Google's current Android screen-recording instructions give a short four-step workflow:
- Swipe down twice from the top of the screen.
- Tap Screen record. If it is hidden, open the Quick Settings editor and add it.
- Choose what to capture, including audio or visible touch points when those options are offered, then tap Start.
- Stop from the screen-recorder notification in the notification shade.
On Pixel phones, Google notes that some of these steps require Android 11 or later. Other manufacturers may use a slightly different tile name, menu position, storage folder, or audio picker. The principle remains the same: look for the phone's own capture control before adding software.
Make a ten-second test recording before the real session. Play it back with headphones and check four things: the full screen is visible, the intended audio is present, taps are shown only when useful, and private notifications did not appear.
Why No Root Is Usually the Safer Choice
Root access changes the device's normal security boundary. It may be useful for specialized development or device-research work, but it is excessive for an ordinary tutorial, bug report, gameplay clip, or app walkthrough.
A normal no-root recording flow has several practical advantages:
- the system presents a visible capture permission or active-recording indicator;
- the recording can be stopped from Quick Settings or a notification;
- banking, streaming, work-profile, or other protected apps can enforce their own capture rules;
- software and security updates are less likely to be disrupted by device modification;
- troubleshooting stays focused on recording settings instead of bootloader, warranty, or recovery issues.
Android's media-capture model also explains why a recorder can produce silence or a black frame even when the recorder itself is working. The Android media capture documentation says an app can prevent its playback audio from being captured, while a device administrator can disable screen capture. A protected app or managed work profile is therefore not something a responsible recorder should promise to bypass.
Fix a Missing Screen Record Control
If Screen record does not appear, work through these checks in order.
| Check | What to do | What the result means |
|---|---|---|
| Quick Settings editor | Swipe down twice, tap Edit, and look for a hidden Screen record tile | The feature exists but was not pinned |
| Android version | Open Settings > About phone and check the Android version | Older devices may not include the current built-in workflow |
| Manufacturer support | Search the phone maker's official support site for the exact model | The maker may use another menu or proprietary recorder |
| Work profile or policy | Ask the administrator whether screen capture is disabled | A managed-device rule may block recording |
| App fallback | Compare a small number of Play Store recorders by permissions and recent support | Use only when the system option is genuinely unavailable |
Do not install a random APK simply because a search result promises "no root" or "protected recording." If you need an app, prefer a current Play Store listing, read the permission request before accepting it, and leave Google Play Protect enabled. Google's Play Protect guidance says it checks Play Store apps before download and scans the device for potentially harmful apps from other sources.
Fix Silent Audio or a Black Recording
The recorder can capture the screen correctly while one source is missing. Diagnose the result instead of repeating a long recording with the same settings.
The video has no sound
Start another short test and inspect the audio choices before the countdown. Depending on the phone, you may see options such as device audio, microphone, both, or no audio. If device audio is selected but the result is silent, the app being recorded may not allow playback capture. Use microphone narration only when it is appropriate and you have permission to record the surrounding conversation.
The recording shows a black or blank area
Try recording the home screen or a non-sensitive app. If that works, the original app is probably restricting capture. Do not look for a bypass for financial, private, DRM-protected, or managed content. Record your own explanation, use an approved screenshot supplied by the app, or link to the official source instead.
Notifications reveal private information
Turn on Do Not Disturb, close messaging and password-manager overlays, and review the notification shade before starting. If the phone lets you record one app instead of the entire screen, choose the narrower scope. Delete failed takes that contain account names, messages, one-time codes, or location information.
The file stutters or stops early
Free storage, close heavy apps, lower the recording resolution when the phone offers that control, and keep the device cool. A short preflight clip is more useful than trusting a feature list or repeating a thirty-minute failed capture.
Choose a Third-Party Recorder Safely
A fallback app is reasonable when the device has no built-in recorder or when you need a documented feature such as facecam, annotations, or a particular export control. Evaluate the current listing and an actual test export rather than relying on an old roundup.
Use this checklist:
- Recent maintenance: the app still supports your Android version and device class.
- Permission fit: requested permissions match the recording job; a screen recorder should not need unrelated access without a clear explanation.
- Audio behavior: the listing distinguishes microphone recording from internal playback capture.
- Export control: you can find the local file, play it outside the app, and understand resolution or frame-rate options.
- Watermark and limits: the current free-plan behavior is stated clearly and confirmed in a short export.
- Privacy: recordings are not uploaded by default unless cloud processing is an intentional part of the workflow.
- Support path: there is a current official help or contact page for failures and billing questions.
No-root is a useful filter, but it is not a quality guarantee. Permissions, storage behavior, maintenance, and an exported test file tell you more than a marketing label.
Use a Mac Recorder for the Desktop Half of the Workflow
An Android recorder and a desktop recorder solve different jobs. Use the phone's built-in recorder for what happens on the phone. If the final tutorial also needs a Mac browser, terminal, editor, or voice-over segment, capture that desktop portion separately and combine the clips in your normal editor.
Redol Screen Recorder is currently a macOS product, not an Android recorder. Its current local product page positions it for Apple Silicon Mac capture with local MP4 export, system audio, microphone narration, and webcam overlay. It should be used only for the Mac portion of a cross-device tutorial.
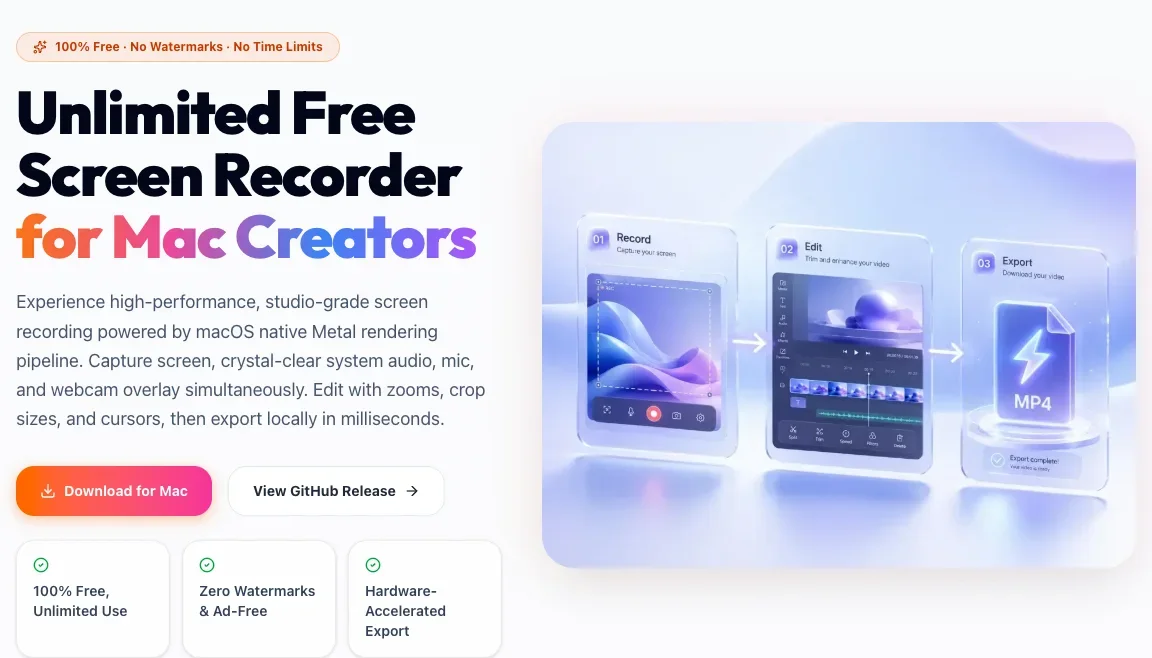
Record the desktop part of your tutorial locally
Use Redol Screen Recorder for the Mac segment, while your Android phone handles its own screen capture.
For more desktop-specific guidance, see how to screen record on a Mac with audio. If you are still choosing a desktop capture category, use the desktop screen recorder comparison instead of assuming a mobile recorder should cover both devices.
Run This Preflight Before Every Recording
- Confirm that no private notification or account detail is visible.
- Choose the narrowest screen or app scope offered by the phone.
- Select audio deliberately and use microphone access only when needed.
- Record ten seconds and play the file back with sound.
- Check storage, orientation, resolution, and touch indicators.
- Respect apps that block protected video or audio capture.
- Use a Play Store fallback only when the built-in recorder cannot do the job.
The best no-root workflow is deliberately boring: use the system control, test a short clip, respect capture restrictions, and add software only for a specific missing feature. That produces a more reliable recording without turning the phone itself into the experiment.
Related posts
About the Author

Zhang Guo
AI Product Manager · Digital Marketing Consultant
AI product manager and digital marketing consultant with a background in music. I see creativity as the bridge between rhythm and logic, where musical intuition and mathematical precision can coexist in every meaningful product decision.
Follow on X