The fastest way to screenshot part of your screen on Windows is to press Windows key + Shift + S, choose Rectangular snip, then drag over the area you want. Windows copies the capture so you can paste it immediately, and the Snipping Tool notification lets you open, annotate, crop, save, or share it.
Use this method on Windows 11 or Windows 10 when you need a selected region instead of the whole desktop. If you need motion, narration, or a repeatable demonstration, skip the still image and record a selected area instead.
Screenshot a Selected Area with Win Shift S
Follow this built-in workflow first. It does not require a third-party screenshot app.
- Arrange the window, menu, chart, or message you want to capture.
- Press Windows key + Shift + S.
- Choose Rectangular snip from the capture toolbar.
- Click and drag from one corner of the area to the opposite corner.
- Release the mouse or trackpad button to capture.
- Select the notification if you want to annotate, crop, redact, or save the image.
- Press Ctrl + V in a document, message, image editor, or CMS if you only need to paste the clipboard copy.
Microsoft's current Snipping Tool documentation confirms that Windows key + Shift + S opens the image-snipping overlay. It also documents rectangular, freeform, window, and full-screen capture modes for Windows 11 and Windows 10.
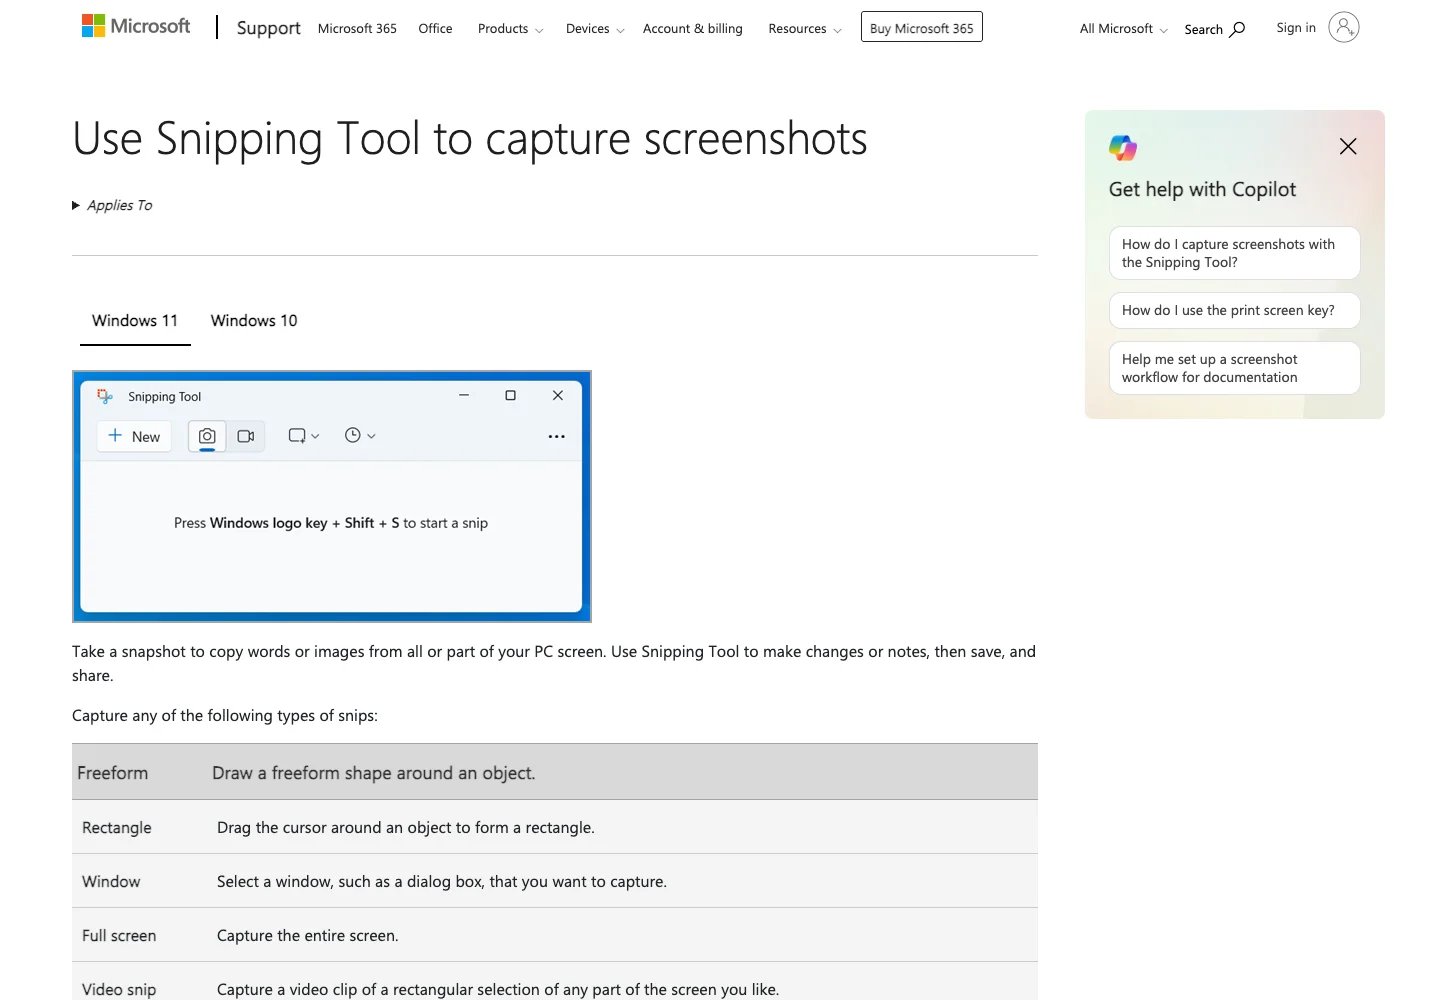
Choose the Right Snipping Mode
The toolbar appears after you press the shortcut. Pick the mode that matches the shape of the content rather than cropping a larger capture later.
| Snipping mode | What it captures | Best use |
|---|---|---|
| Rectangular | A box you draw over the screen | Charts, messages, UI details, document sections |
| Freeform | An irregular outline you draw | Objects that do not fit a clean rectangle |
| Window | One application window or dialog | Clean app screenshots without the rest of the desktop |
| Full screen | Everything visible across the screen | Complete desktop state or multi-window context |
Rectangular mode is the best default for most partial screenshots. Window mode is cleaner when you need an entire app but do not want the taskbar or surrounding windows. Freeform mode is useful occasionally, but a rectangular crop is usually easier to reuse in documentation and social content.
Where the Partial Screenshot Goes
A selected screenshot can exist in two places: the clipboard and a saved file. Treat them as separate steps.
- Clipboard: The capture is ready to paste with Ctrl + V.
- Snipping Tool editor: Open the notification to crop, annotate, copy, or save.
- Screenshots folder: Current Windows 11 Snipping Tool documentation says image snips are automatically saved to the Screenshots folder. You can change automatic saving and the default folder in Snipping Tool settings.
- A file you name: In Snipping Tool, choose Save as, then select a file name, location, and format.
If the notification disappears, first try pasting into Paint, Word, an email, or another editor. The clipboard copy may still be available. On Windows 11, also check Pictures > Screenshots and the automatic-save setting inside Snipping Tool.
Do not promise yourself that a clipboard capture is safely stored. If the image matters for a guide, support ticket, report, or audit trail, save it as a named file immediately.
Use the Snipping Tool App for Delayed Captures
The keyboard shortcut is ideal for content that is already visible. Use the full Snipping Tool app when you need time to open a menu, tooltip, dropdown, or hover state.
- Open Start and search for Snipping Tool.
- Select the image capture mode.
- Choose a delay when the interface offers one.
- Select New.
- Open the menu or state you want before the countdown finishes.
- Draw the capture area and save the result.
Microsoft documents delayed captures for menus and other temporary interface states. This is more reliable than trying to press three keys while holding a menu open.
Fix Win Shift S When It Does Not Work
Work through these checks in order.
Confirm the Windows key works
Press Windows key + R or Windows key + E. If neither shortcut responds, the Windows key may be locked by a keyboard gaming mode, remapping utility, hardware switch, or accessibility setting.
Open Snipping Tool from Start
Search for Snipping Tool and launch it directly. If the app opens, start a rectangular snip from there. This separates a shortcut problem from an app problem.
Check the clipboard
Capture a small region, open Paint, and press Ctrl + V. If the image appears, the capture worked and only the notification or save workflow failed.
Check notifications and automatic saving
Open Windows notification settings and confirm Snipping Tool notifications are allowed. In Snipping Tool settings, review automatic saving and the Screenshots folder before assuming the image was lost.
Update or repair the app
Use Microsoft Store updates for Snipping Tool. If the installed app remains unresponsive, Windows app settings may offer repair or reset controls. Save any important captures before resetting an app.
Try the Print Screen setting
Windows can map Print Screen to screen snipping. Microsoft notes that this behavior can be changed in Settings > Accessibility > Keyboard. The exact default can vary by Windows build and keyboard, so Windows key + Shift + S remains the clearer instruction to share with other people.
Protect Sensitive Information Before Sharing
A partial screenshot reduces visual clutter, but it does not automatically remove private data.
Before you send or publish the image:
- Check the selected area for names, email addresses, phone numbers, account IDs, tabs, notifications, and file paths.
- Crop out anything that is not required for the reader's task.
- Use a real redaction method rather than a translucent highlighter.
- Reopen the saved file and confirm the hidden information cannot be read.
- Give the file a descriptive name that does not expose confidential details.
Current Snipping Tool documentation includes Text Actions for copying text and quick-redacting email addresses or phone numbers on supported Windows 11 builds. Microsoft says that text recognition for this feature is processed locally on the device. Still inspect the final exported image yourself; automated redaction does not replace a visual privacy check.
Screenshot or Record Part of the Screen
A screenshot is best when one frame answers the question. Record a selected area when the reader needs to see timing, cursor movement, transitions, audio, or several steps.
| Need | Use a partial screenshot | Use a region recording |
|---|---|---|
| Show one setting or error | Yes | Usually not |
| Document a menu path | Often | When the sequence is easy to miss |
| Demonstrate cursor movement | No | Yes |
| Explain animation or timing | No | Yes |
| Add voice narration | No | Yes |
| Keep the asset lightweight | Yes | Depends on duration |
Windows 11 Snipping Tool now documents Windows key + Shift + R for recording a rectangular video region. If you are working on Windows 10, verify the recorder available on that machine rather than assuming the same feature set.
For a more production-oriented recording, plan the region before you start: close notifications, set the app size, remove private tabs, test audio, and record a short sample. Redol's guide to recording a specific part of the screen covers that video workflow in more depth.
When Redol Screen Recorder Fits
Redol Screen Recorder is for the next job after a still screenshot when you are recording on a Mac. The current Redol route is explicit that the live client is macOS-first and the Windows client is planned, not available today.
On a supported Apple Silicon Mac, the current product page describes local screen capture with system audio, microphone narration, webcam overlay, zooms, crop and resize controls, cursor emphasis, and local MP4 export. It also states that exported videos have no watermark or recording time limit.

Record a selected workflow when one screenshot is not enough
Use Redol Screen Recorder on Apple Silicon Mac for local screen, system audio, microphone, webcam, zoom, crop, cursor, and MP4 workflows.
Do not install Redol on Windows for this task: the current Windows build is only planned. Use Windows Snipping Tool for the screenshot, and choose a currently supported Windows recorder if the task becomes a video.
A Better Built-In-First Workflow
The competitor page that surfaced this opportunity is a FonePaw partial-screenshot guide. Its structure mixes Windows' built-in shortcut with a third-party recorder path and older Windows-version guidance.
The stronger current workflow is simpler:
- Start with Windows key + Shift + S.
- Use Rectangular or Window mode.
- Open the notification only when you need editing or a named file.
- Verify the clipboard and automatic-save location.
- Redact sensitive information.
- Switch to a region recording only when motion or narration adds value.
That built-in-first order solves the immediate screenshot task before asking the reader to evaluate another tool. It also keeps a screenshot article distinct from a screen-recorder roundup or a Snagit alternatives comparison.
Final Answer
To screenshot part of your screen on Windows, press Windows key + Shift + S, choose Rectangular snip, drag across the area, then release. Paste the clipboard copy with Ctrl + V, or open the Snipping Tool notification to crop, annotate, redact, and save.
Use the Snipping Tool app with a delay for menus and temporary interface states. If the shortcut fails, test the Windows key, open Snipping Tool directly, check the clipboard, review notifications and save settings, then update or repair the app.
Choose a still screenshot for one visible state. Choose a selected-area recording when timing, cursor movement, audio, or multiple steps are essential.
Related posts
About the Author

Zhang Guo
AI Product Manager · Digital Marketing Consultant
AI product manager and digital marketing consultant with a background in music. I see creativity as the bridge between rhythm and logic, where musical intuition and mathematical precision can coexist in every meaningful product decision.
Follow on X